29-Jul
Sometimes it can be more convenient to work with WordPress on your local machine. All the same, if you're unfamiliar with how to install WordPress locally, you might be wondering whether it'due south something you tin can manage on your ain.
The skillful news is that installing WordPress locally can be done in a few simple steps. Whether you desire to test out new features, experiment with development projects, or build a WordPress site before pushing it alive, a local WordPress install can help you do that.
In this post, nosotros'll share how y'all can install WordPress locally on Windows, Mac, and Ubuntu/Linux using DevKinsta, DesktopServer, XAMPP, WAMP, or MAMP.
Permit's get started!
An Introduction to Installing WordPress Locally
Here at Kinsta, we have a staging environs that allows for like shooting fish in a barrel development and testing. Withal, installing WordPress locally also has some advantages. For example, perhaps you're traveling and don't have access to Wi-Fi. If that's the case, you may require a local install to go along working.
Additionally, when it comes to manipulating files and local editing, a local install tin sometimes be faster. At that place is usually less setup involved to go it up and running.
When you want to install WordPress locally, you demand to become a local AMP stack set up on your motorcar. In the case of WordPress, AMP stands for Apache, MySQL, PHP. These are the software needed to mimic what a managed WordPress host would exist running for y'all on its web server.
At that place are a variety of methods you tin apply to practise this. The most common options include WAMP, XAMPP, and MAMP. These are neat tools and we'll walk you through each one.
However, they are designed to work with a variety of other software and tools and can have a bit of a learning bend. Therefore, we'll start by introducing you to DesktopServer, which was actually designed and optimized specifically for WordPress as a local AMP stack.
How to Install WordPress Locally with DevKinsta
DevKinsta is Kinsta's very own local development tool for WordPress. DevKinsta lets you create local WordPress sites with a single click, and it ships with advanced database and email management tools, and full integration with MyKinsta.
Best of all, DevKinsta is completely costless!

Before we swoop into how to install DevKinsta, hither are a few key features:
- One-click WordPress site creation with multisite and WP-CLI support.
- A modern stack powered by Nginx, MySQL, and the latest versions of PHP.
- MyKinsta integration – import Kinsta-hosted sites, and push changes to Kinsta.
- Database management with Adminer.
- SMTP server and e-mail capture tool for inspecting outgoing emails.
DevKinsta is available as a complimentary download for macOS, Windows, and Linux (Ubuntu).
Let's walk through how to get DevKinsta set up on your computer.
Pace 2: How to Download and Install DevKinsta
To go started, download the latest version of DevKinsta here.
- To install DevKinsta on macOS, open the DMG file, and drag the DevKinsta app into your "Applications" binder. Double click on DevKinsta in your "Applications" binder.
- To install DevKinsta on Windows, double click on the DevKinsta executable and pace through the installation wizard.
- To install DevKinsta on Ubuntu, download the .deb package and install it. This tin can be done on the control-line, or with your preferred package installer.
When you starting time DevKinsta for the first fourth dimension, Docker Desktop will be installed as a dependency. DevKinsta uses Docker Desktop for creating containerized WordPress environments.
During the DevKinsta installation process, you may see a popup bulletin that says, "Docker Desktop needs privileged access." If you see that message, click "Okay" and provide the password for your user account so Docker Desktop tin can be installed correctly.
Subsequently you provide the password for installation, DevKinsta will install Docker Desktop forth with some Docker images. The installation tin take some time depending on the speed of your Cyberspace connection, so feel gratuitous to step away from the figurer for a while.
How to Create a Local WordPress Site with DevKinsta
DevKinsta supports iii methods for creating local WordPress sites.
- New WordPress Site lets you create a local site with the default hosting stack consisting of Nginx, MySQL, PHP seven.iv, and the latest version of WordPress.
- Import from Kinsta lets you lot clone a site hosted on Kinsta to your local computer with just a few clicks. After you're finished with your work, y'all can fifty-fifty push changes back to a Kinsta staging surround!
- Custom Site lets you create a local site with a customized hosting stack. This option allows you lot to cull your PHP version of choice, specify your database name, and enable WordPress multisite.
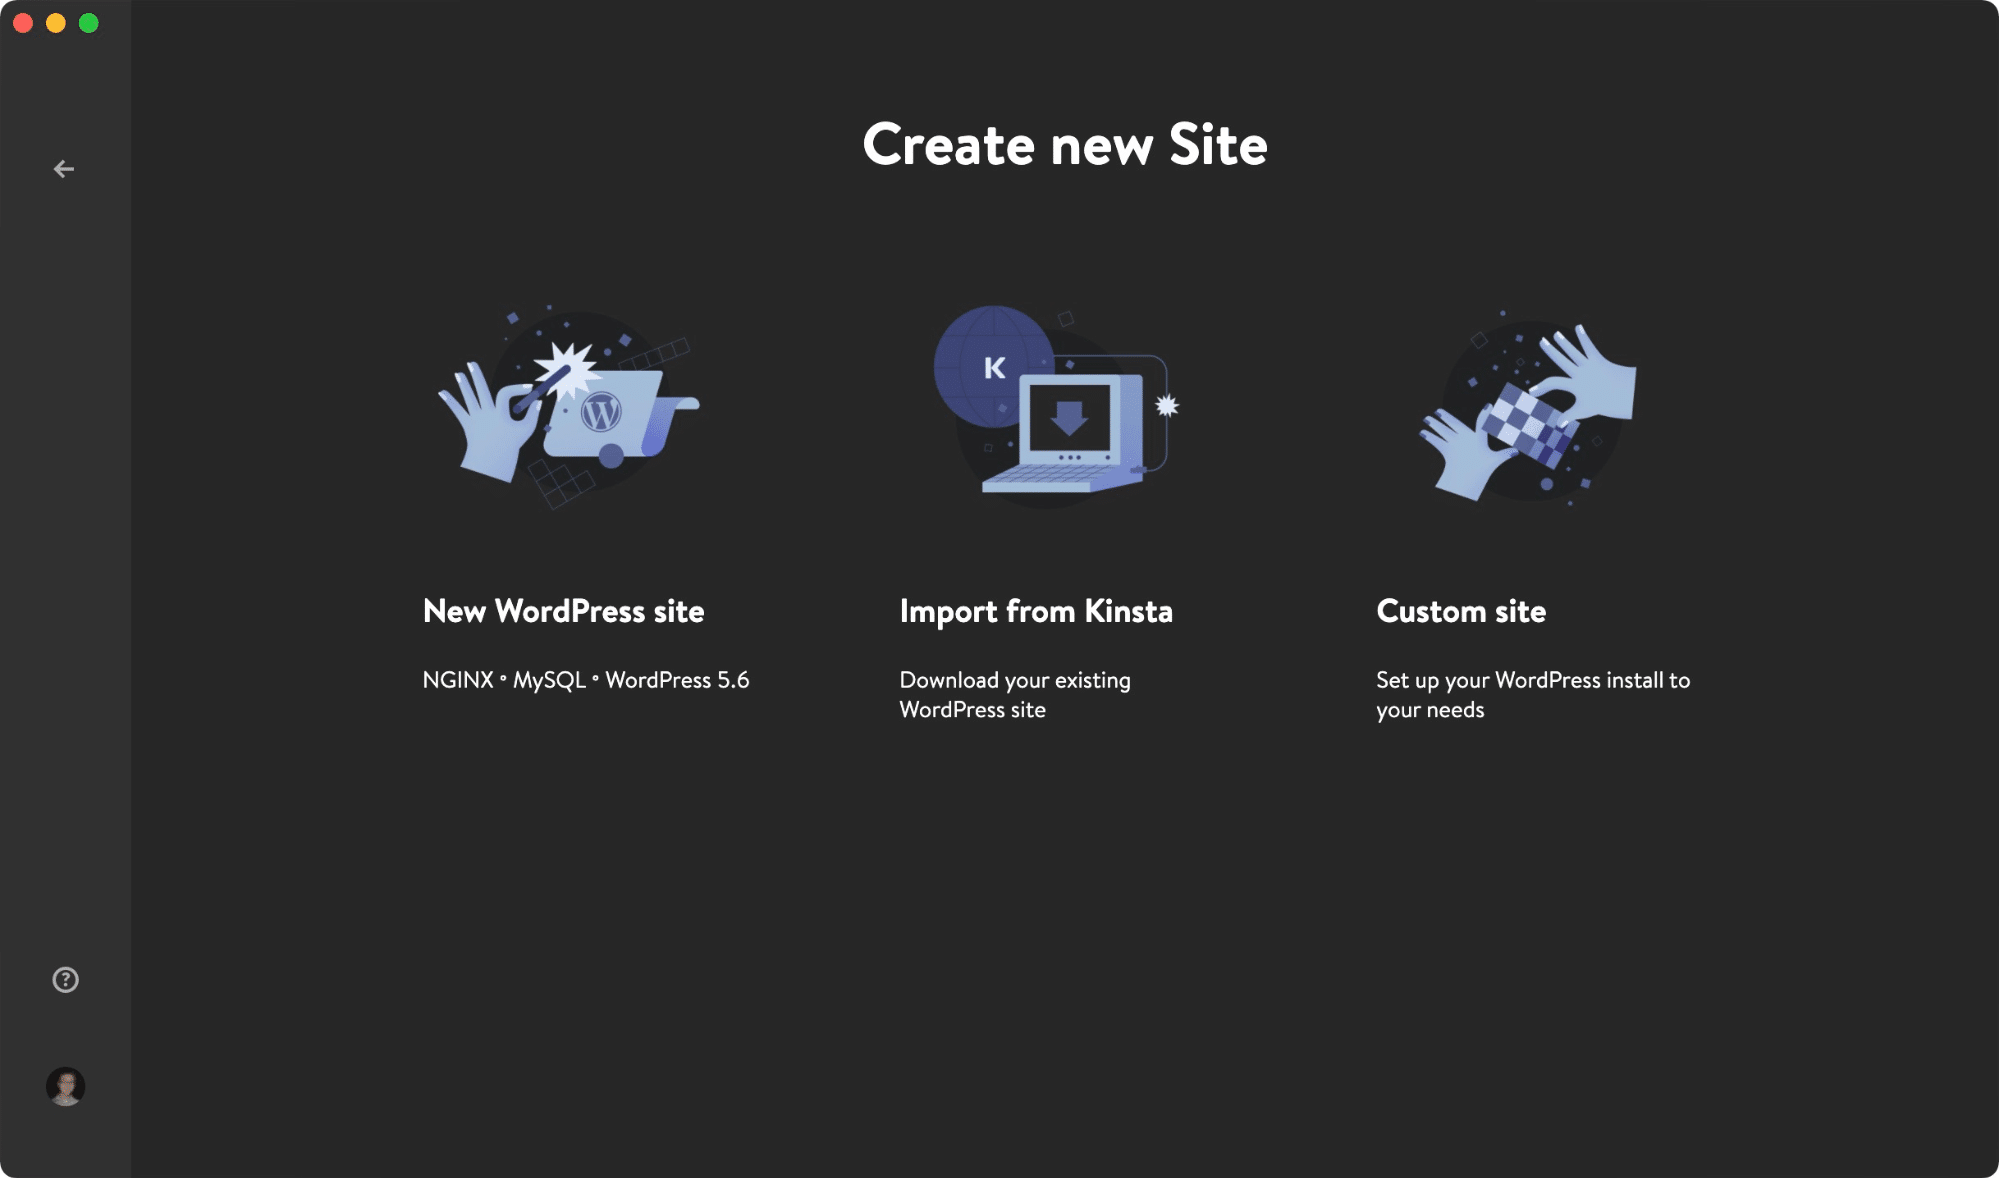
Let's take a look at each site creation method more closely.
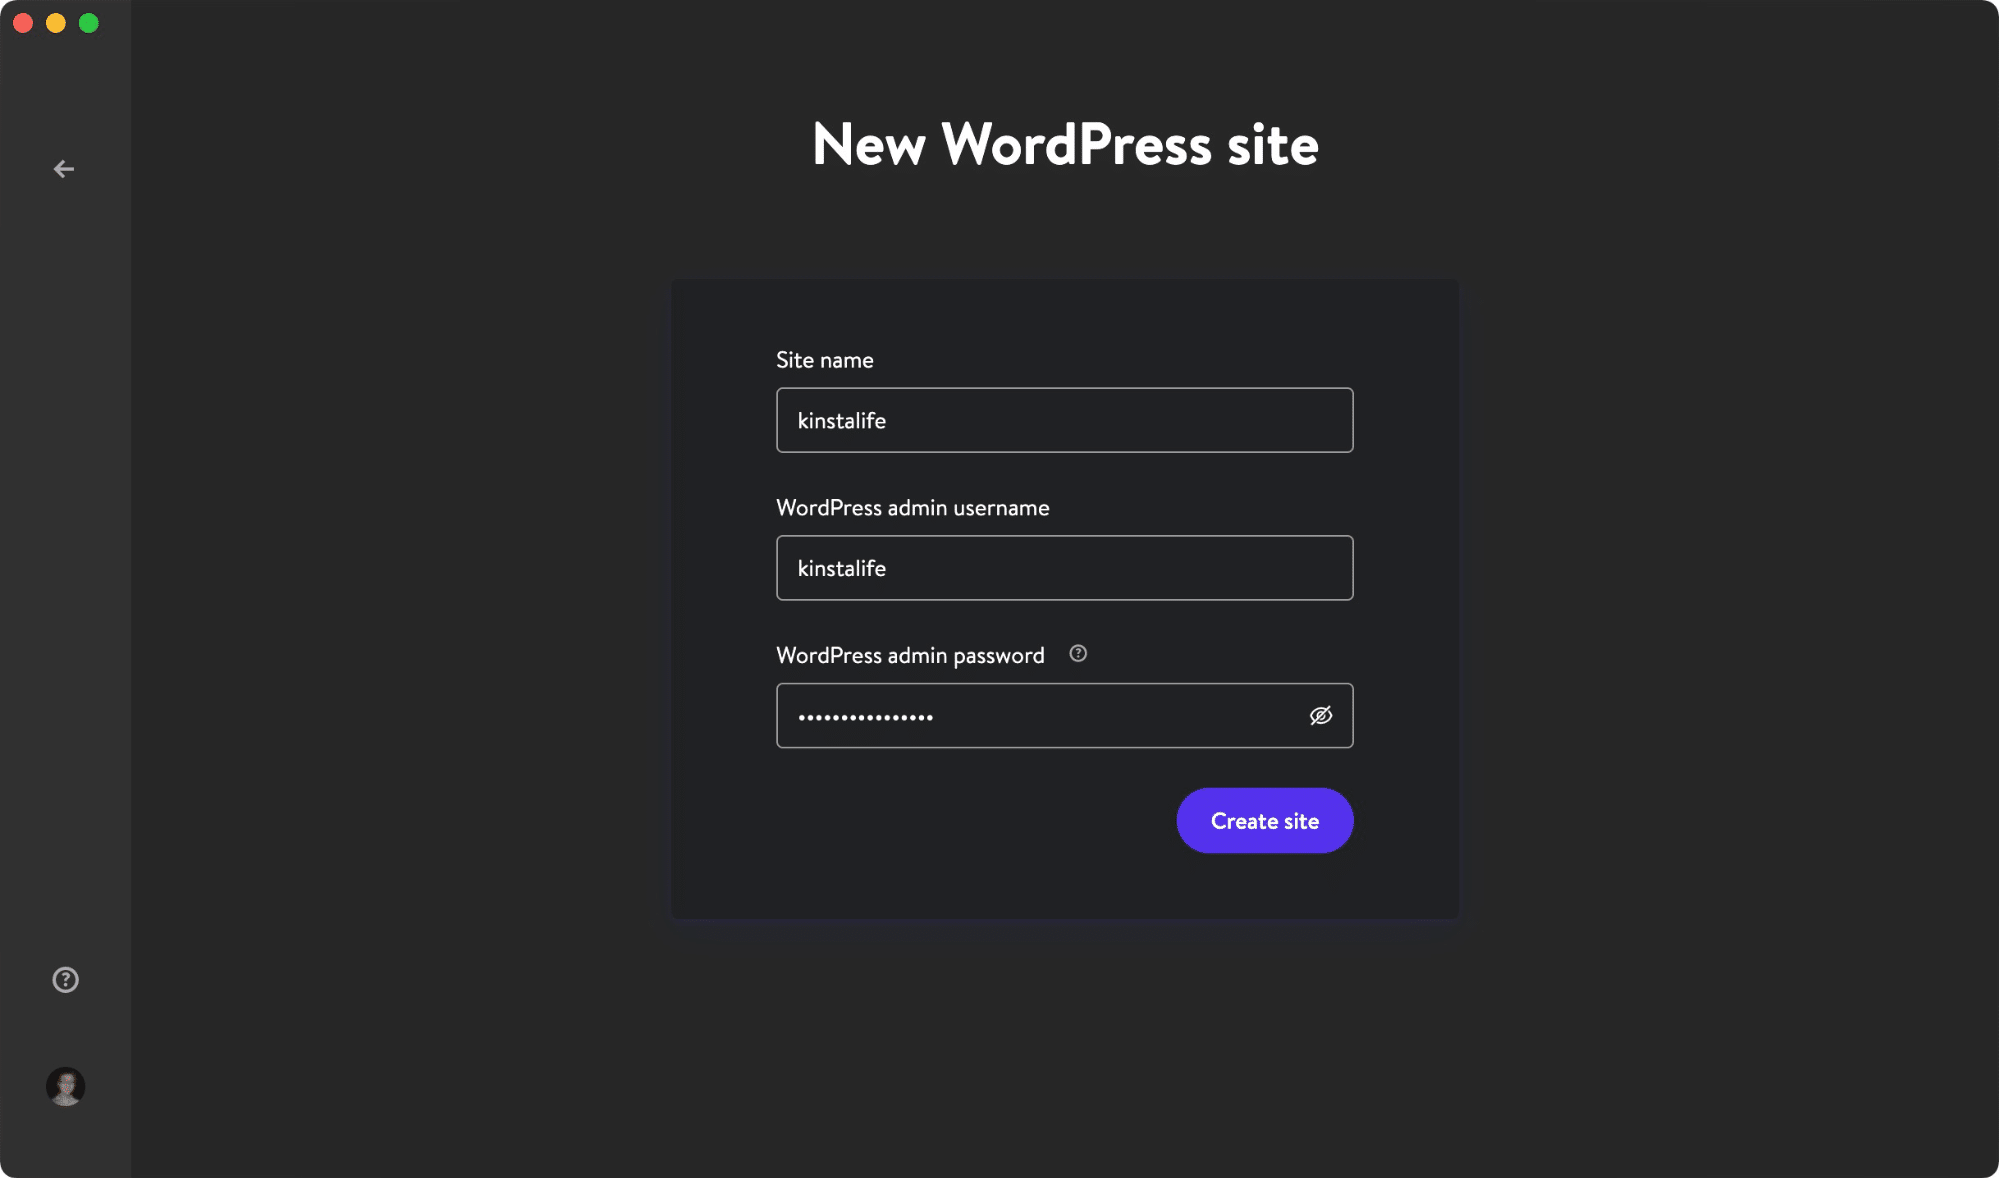
New WordPress Site
To get started, select the "New WordPress Site" pick. For this site creation method, all you have to practise is specify a site name, WordPress admin username, and WordPress admin password. After you've filled in these three fields, click "Create Site".
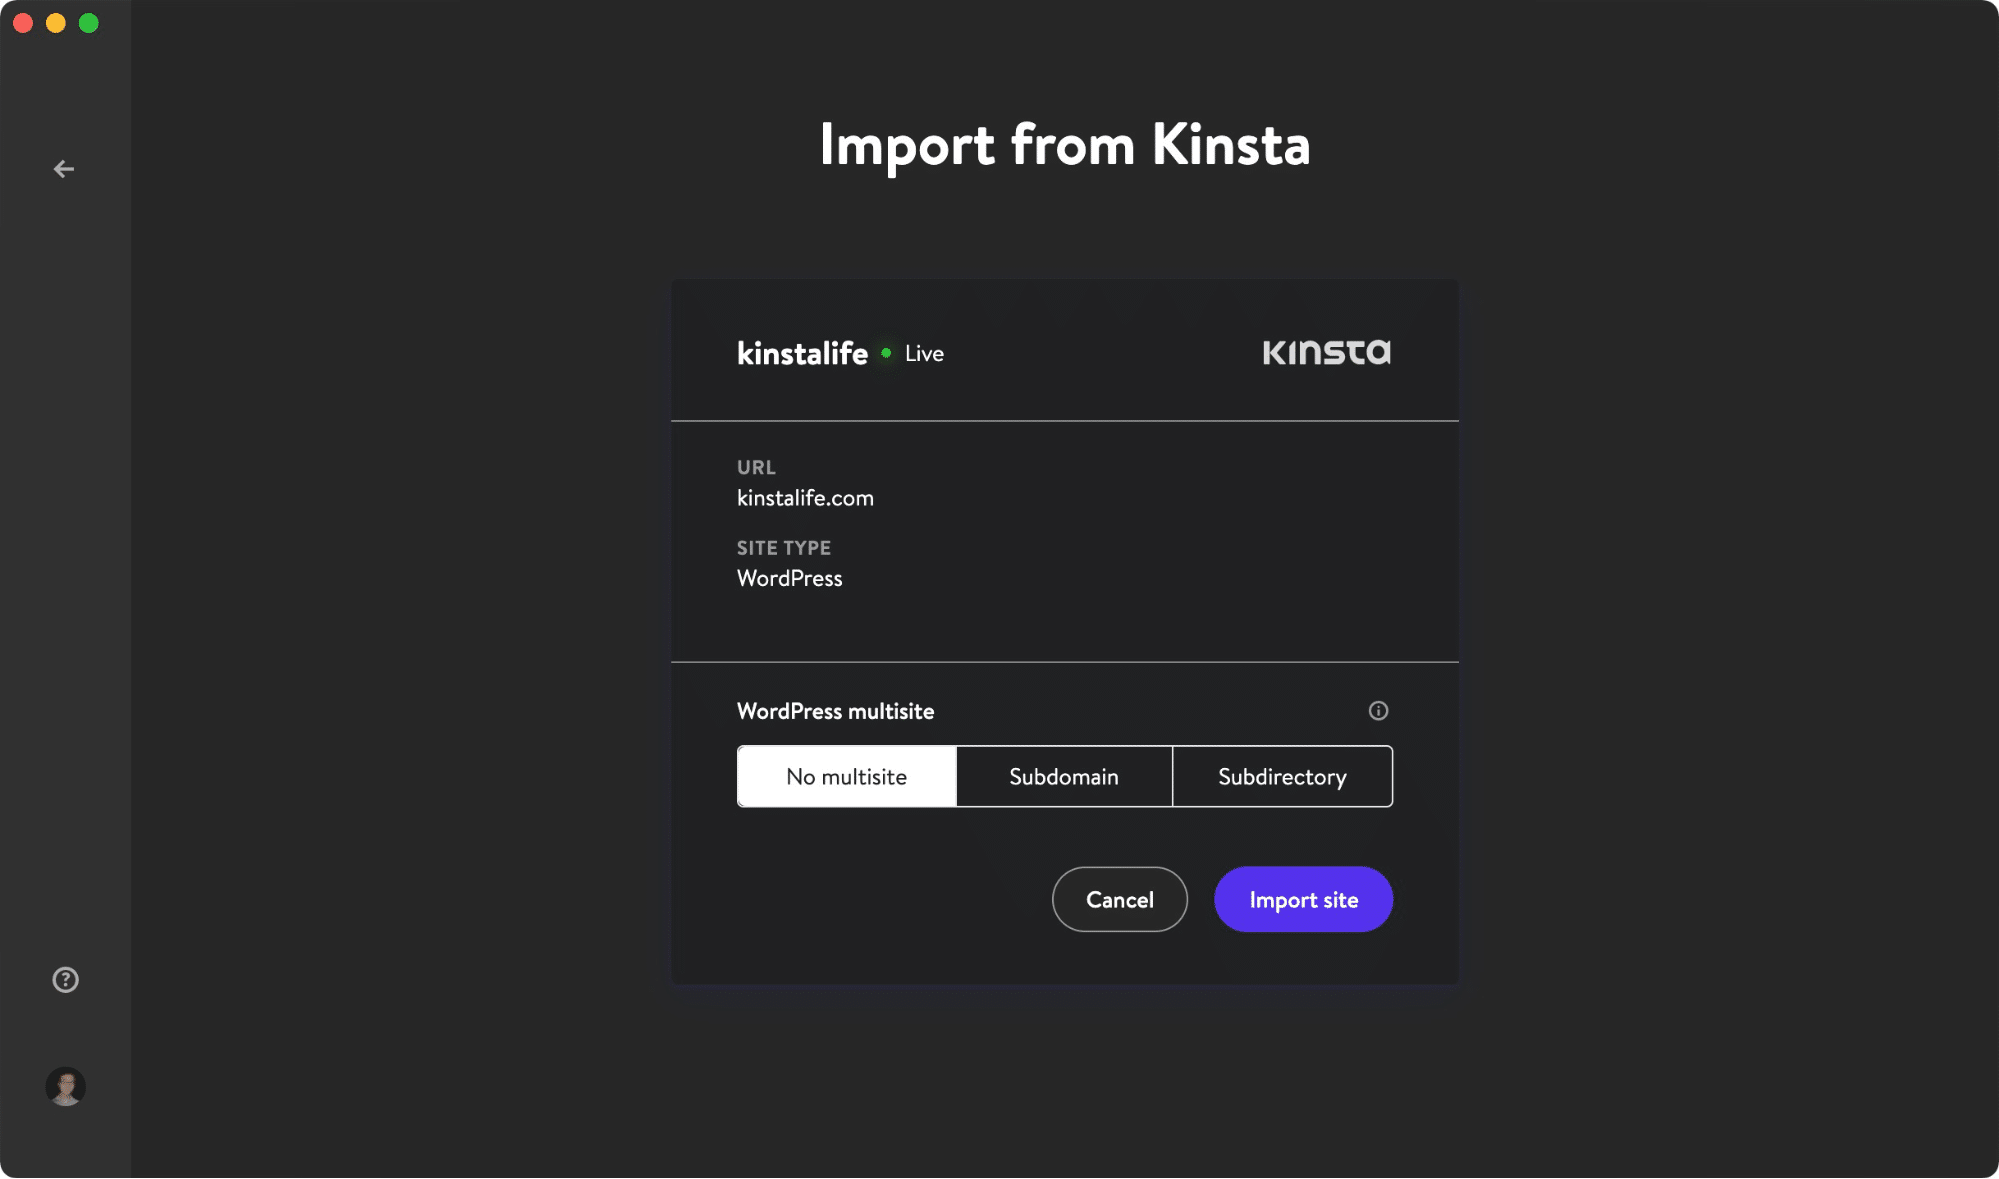
Import from Kinsta
The second choice is to import a site environment that'due south already hosted on Kinsta. To do this, click "Import from Kinsta" and provide your MyKinsta login details.
Later logging in, select the Kinsta environment yous'd like to clone to your local estimator. DevKinsta supports both live and staging environments on Kinsta, so be sure to choose the correct one.
Afterwards clicking on an environment, specify whether the site is a multisite installation and click "Import Site" to kickoff cloning your site.
Custom Site
The third and last choice, "Custom Site", lets you configure specific settings for your local WordPress installation.
Here are the settings you lot can tweak with this site creation method:
- Site Name
- PHP Version (PHP seven.2, 7.iii, 7.iv, and 8.0)
- Database Name
- Enable HTTPS
- WordPress Site Title
- WordPress Admin Email
- WordPress Admin Username
- WordPress Admin Password
- WordPress Multisite Mode
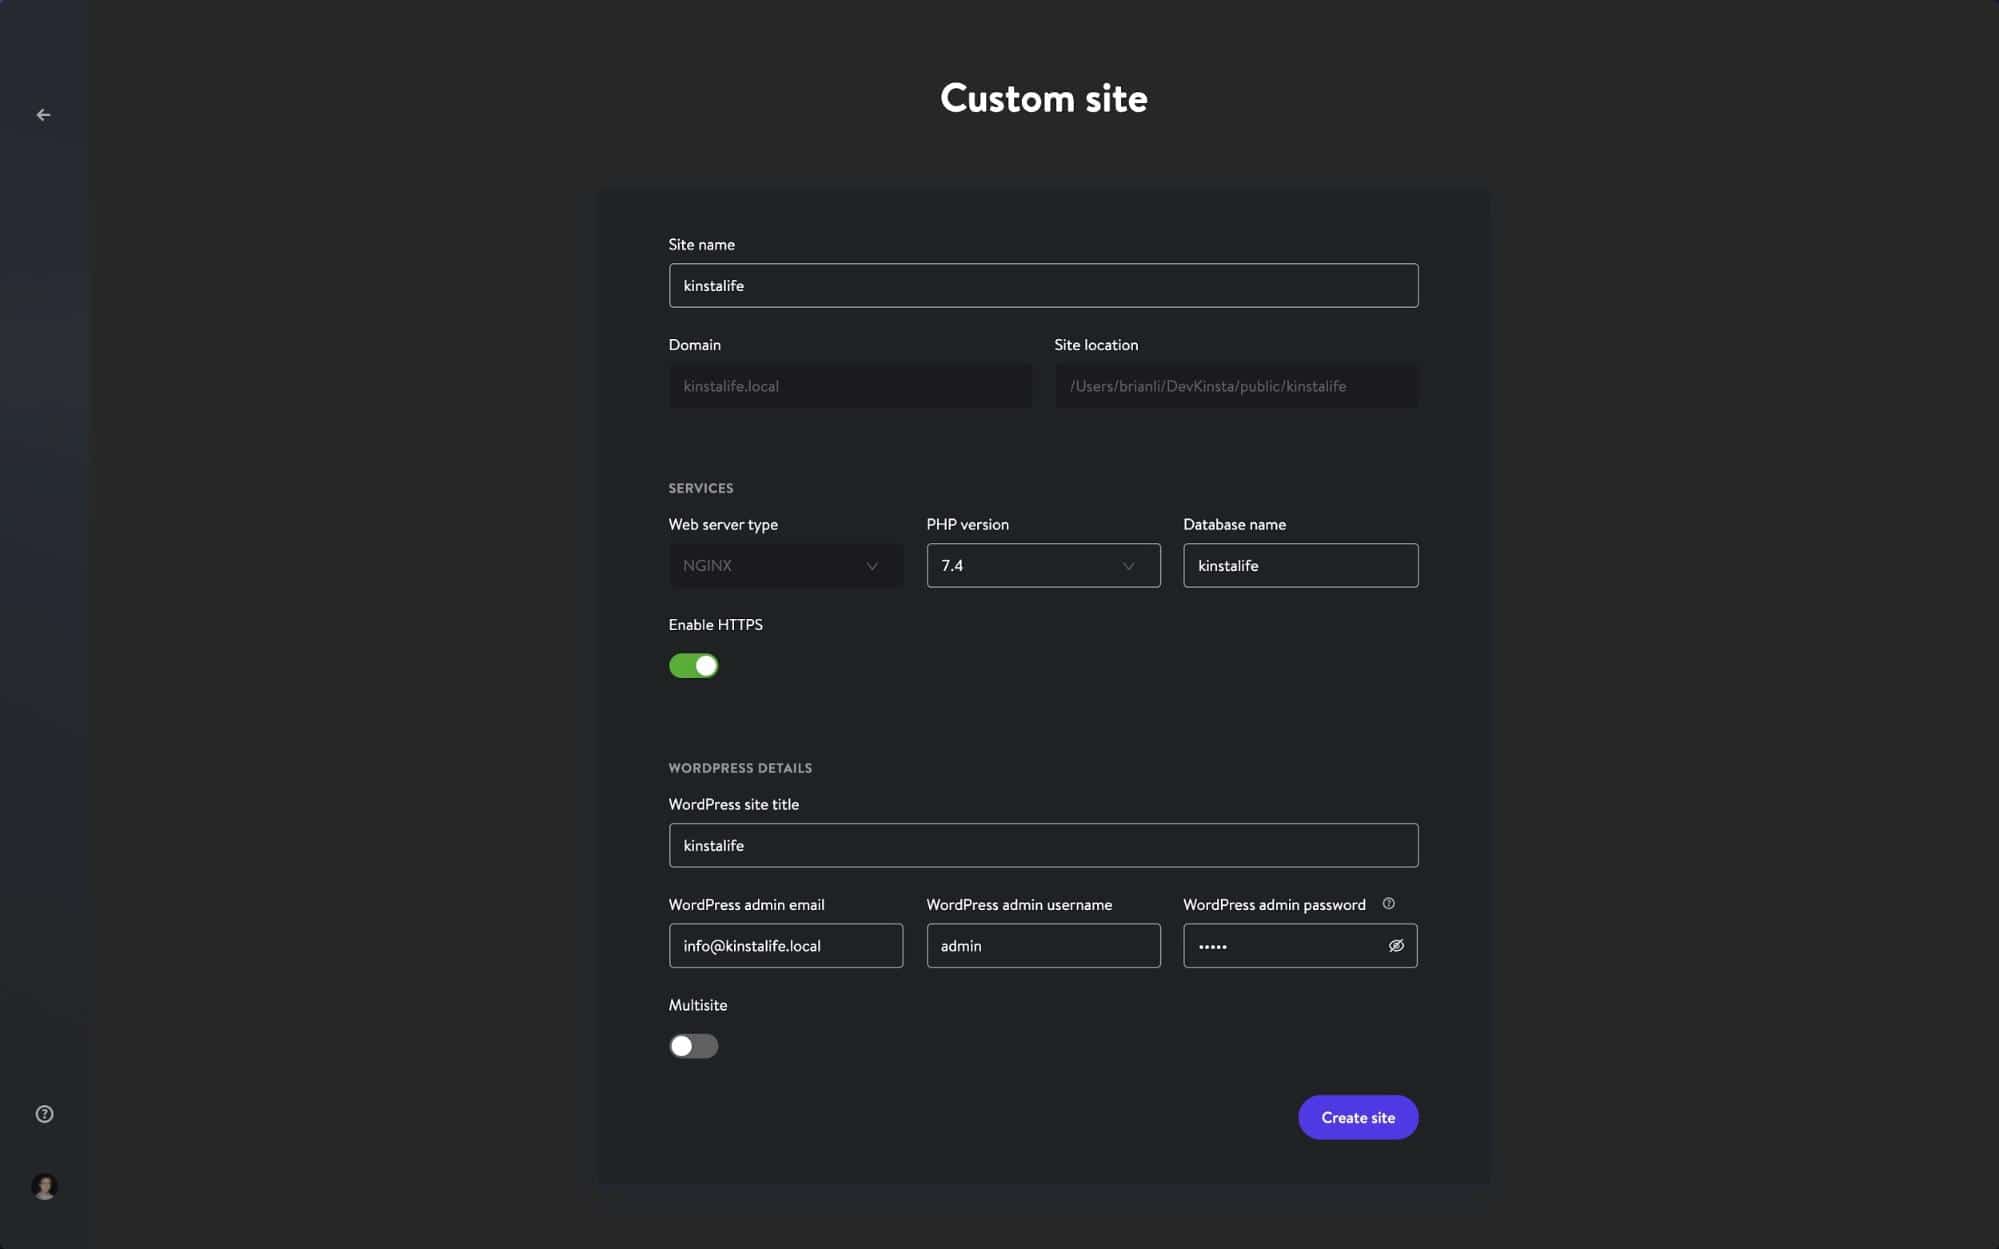
After configuring your desired settings, click "Create Site" to start the site creation process.
Navigating DevKinsta'southward "Site Info" Screen
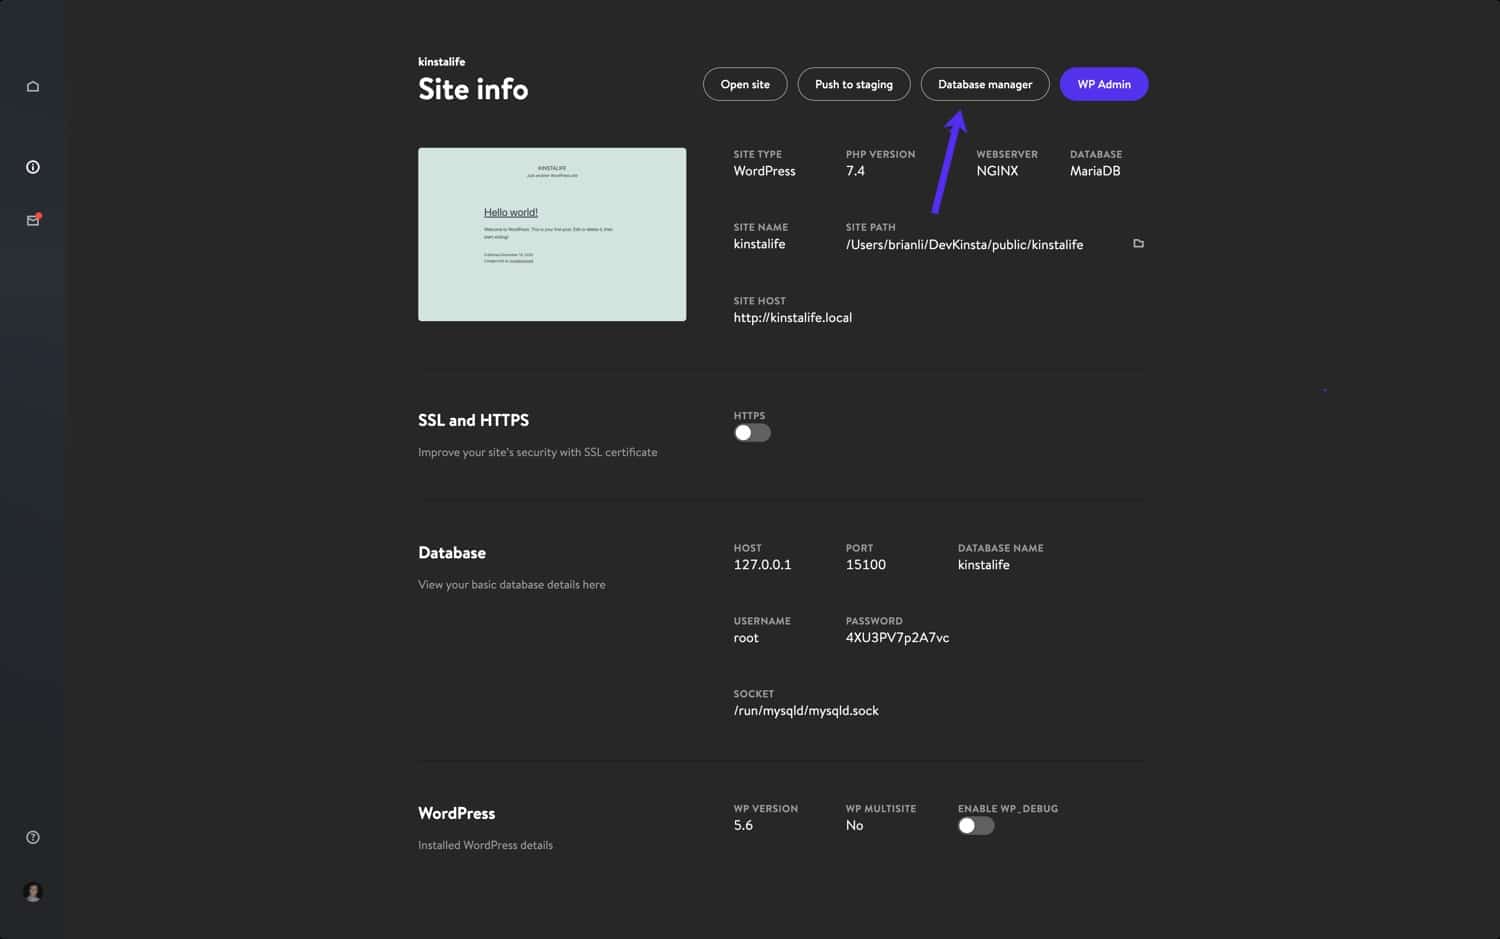
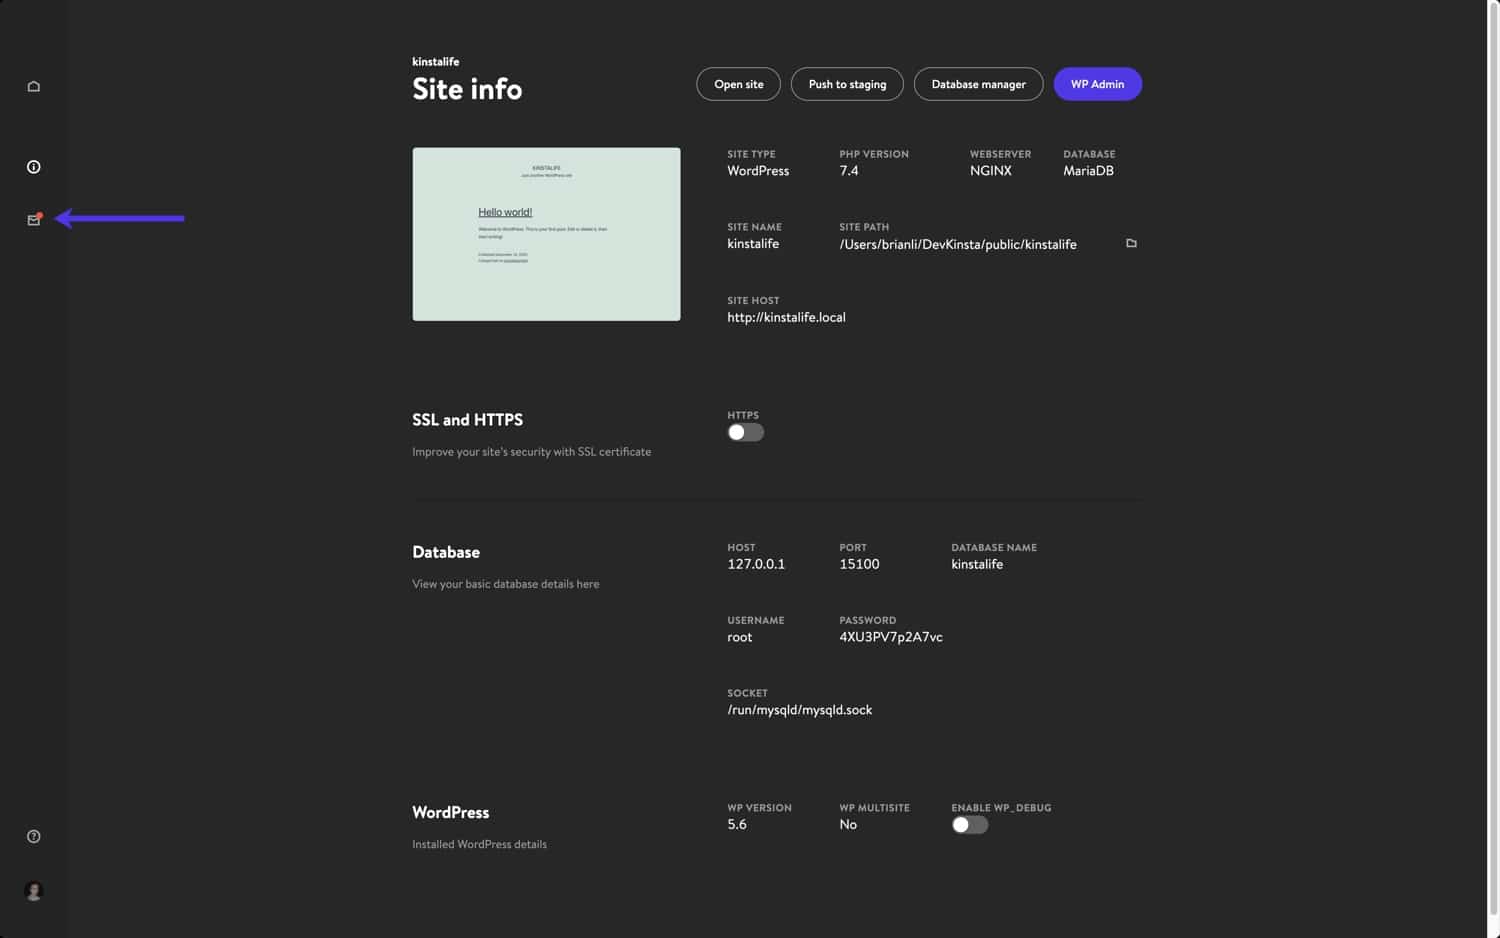
After creating a site, you'll run into the "Site Info" screen. Each site created in DevKinsta has its own "Site Info" page, and you tin can recollect of this screen as the mission command dashboard for a local WordPress site.
On this screen, yous can detect useful data like site identity details, PHP version, WordPress version, SSL fashion, database credentials, site host name.
The "Site Info" screen also has convenient buttons for opening your local site in a web browser, pushing a site to a Kinsta staging environment, launching Adminer for database direction, and accessing the WordPress admin dashboard of your local WordPress install.
Let's walk through the key aspects of each section of the "Site Info" screen.
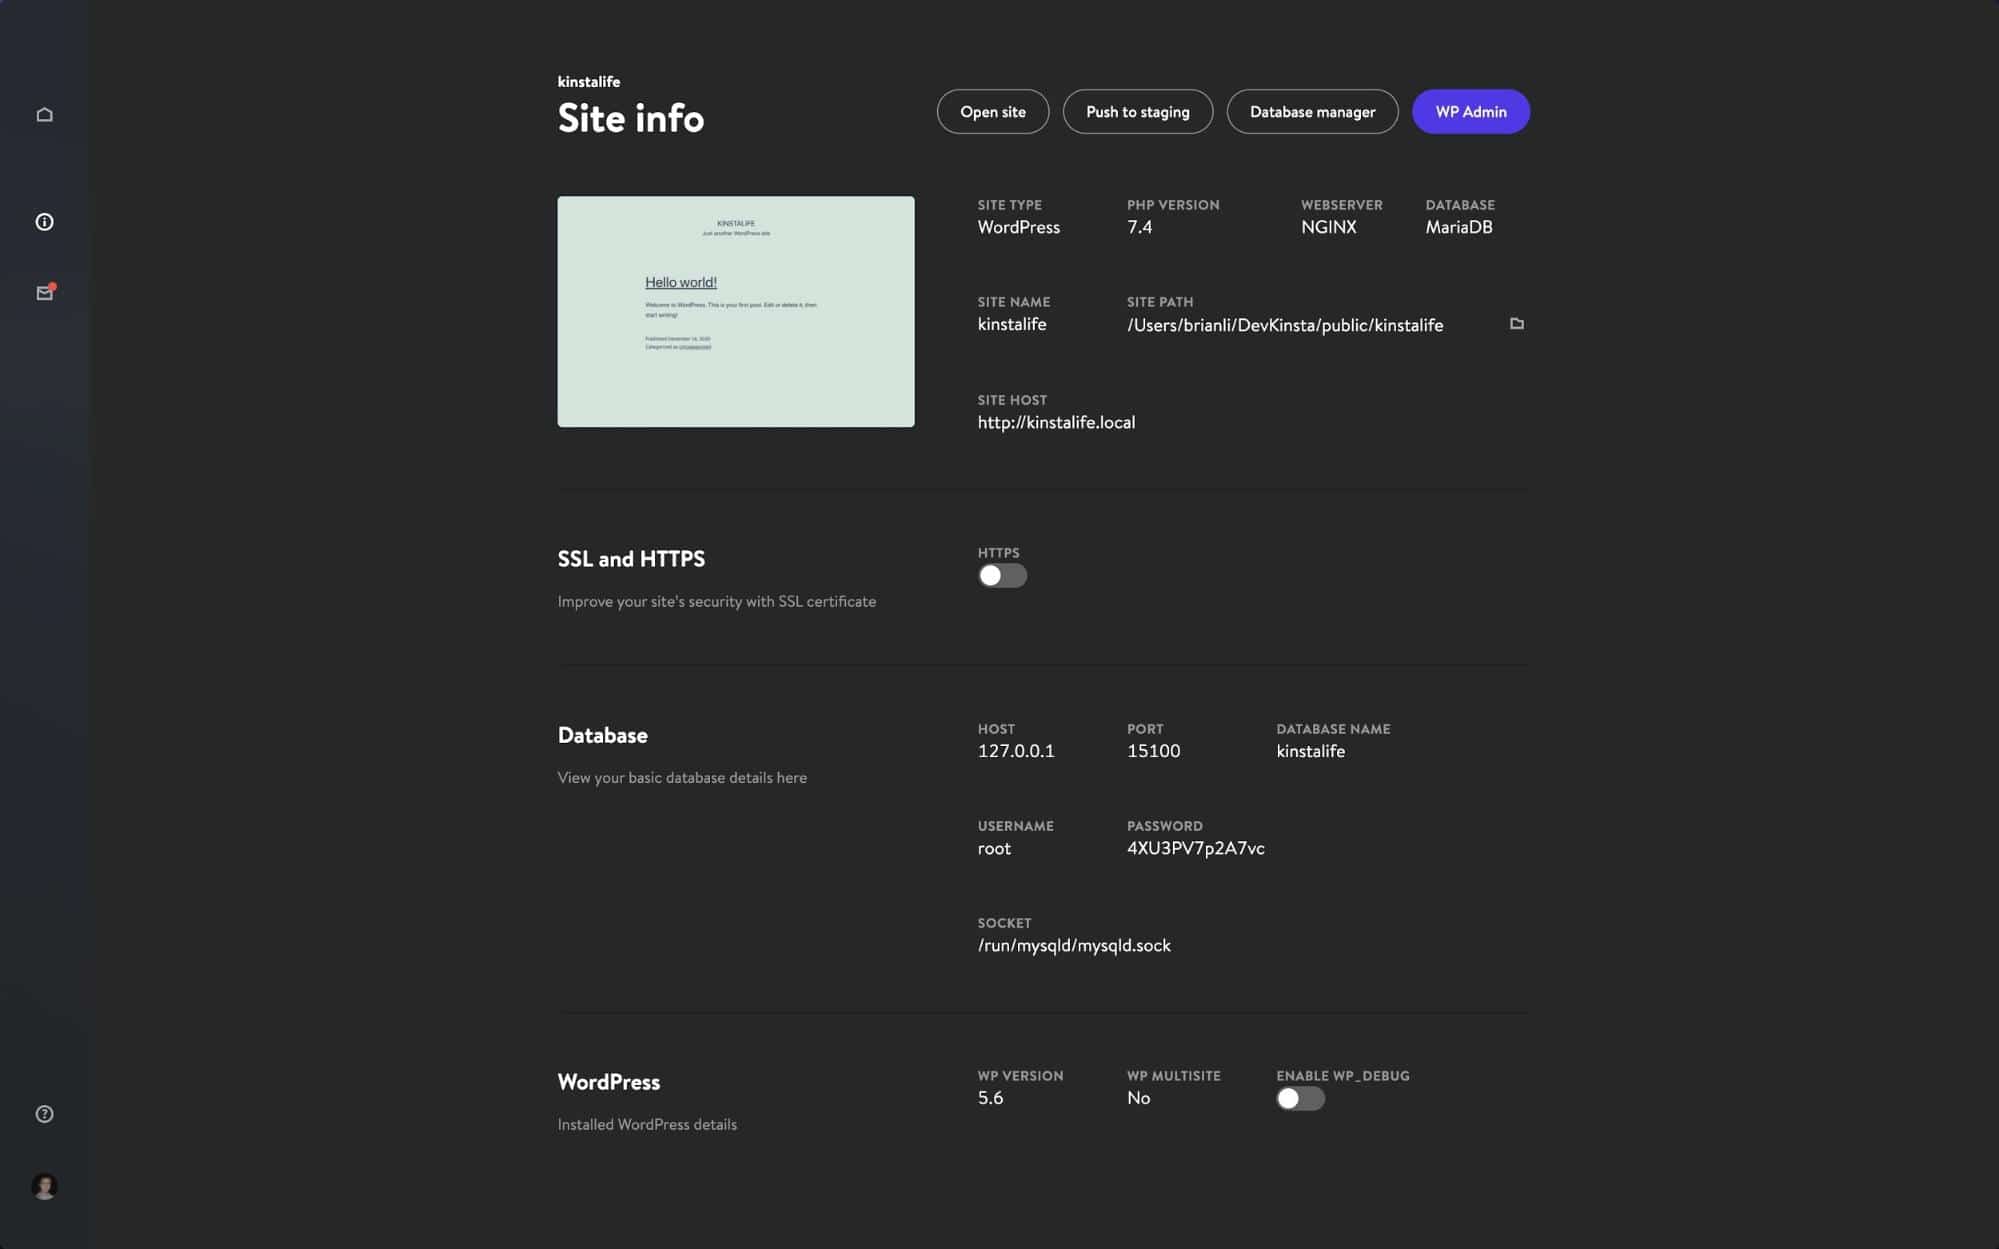
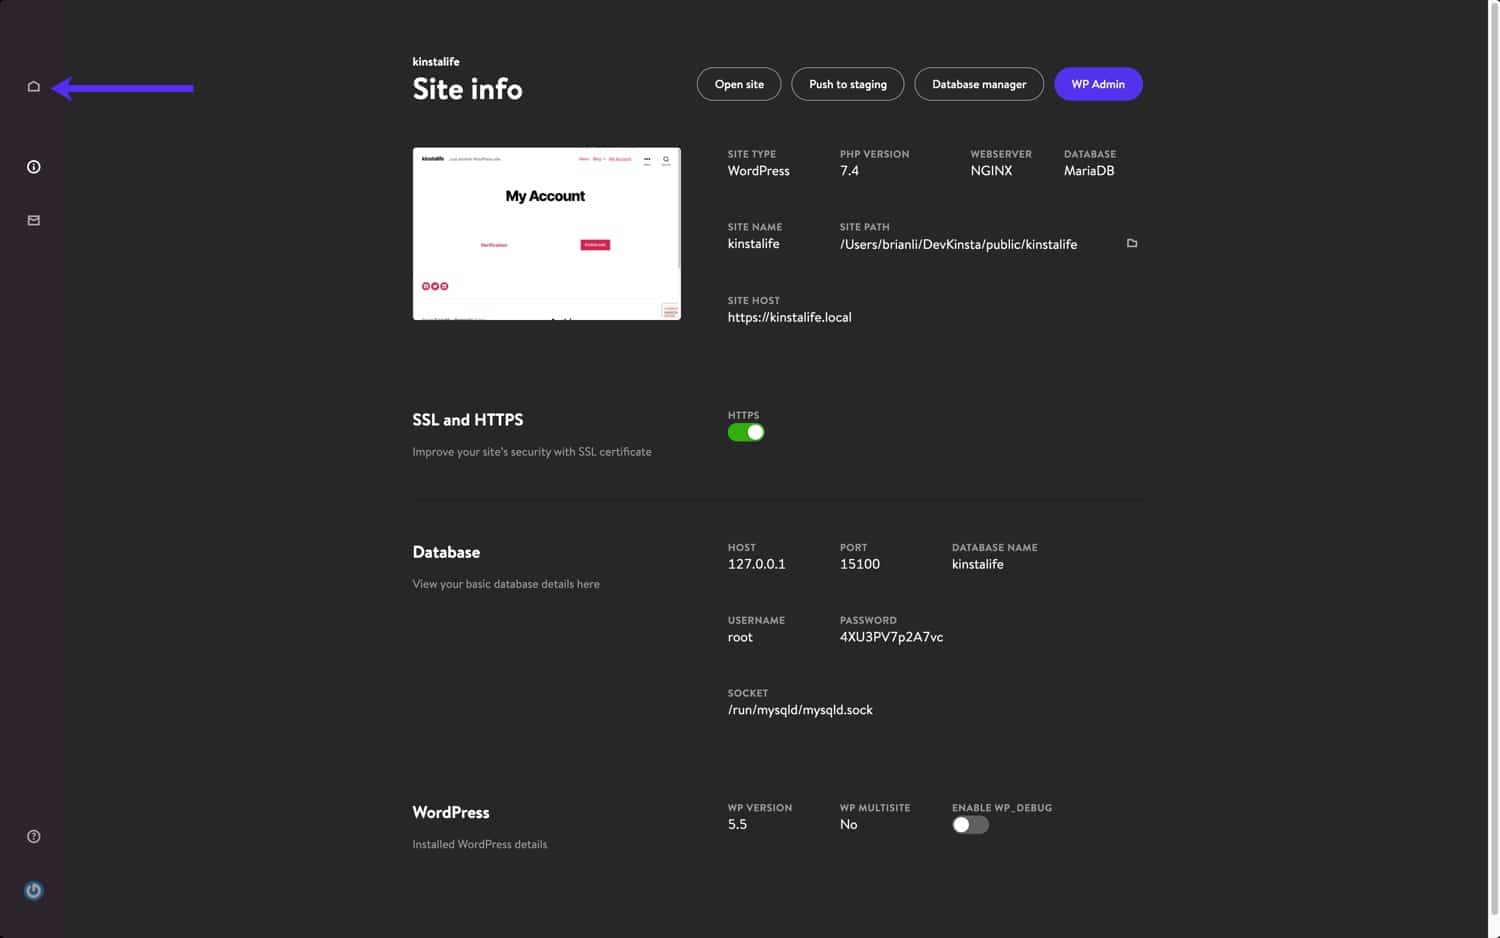
The top of the "Site Info" screen has general information near your WordPress site. For developers, the "Site Path" and "Site Host" are especially useful. The "Site Path" refers to the location of the WordPress install on the local filesystem, and you tin click on the binder icon to go straight to the folder and commencement editing themes, plugins, and more than. The "Site Host" is a custom .local domain name (due east.g. https://kinstalife.local) that you lot tin can use to access a local WordPress site in a web browser.
The "SSL and HTTPS" section contains an HTTPS toggle, which automatically generates an SSL certificate for your local WordPress site, and allows you to access the site over HTTPS.
The "Database" section displays the database settings for your local WordPress site. This information if you want to access your WordPress database via the MySQL command line tool or a third-party database management tool.
Lastly, the "WordPress" section displays your WordPress Cadre version, multisite mode status, and there'south even a toggle for enabling WP_DEBUG mode to troubleshoot your WordPress site.
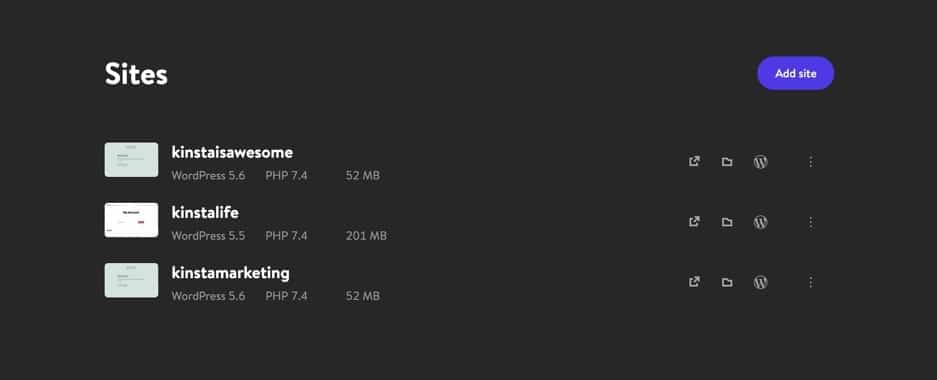
Managing Multiple Sites in DevKinsta
For agencies and developers working on multiple projects at in one case, DevKinsta lets yous deploy and manage multiple local WordPress sites! Every local WordPress site managed by DevKinsta runs in its ain containerized environment. This means every site has its ain customizable PHP version, WordPress version, email inbox, and more.
To view your DevKinsta site listing, click on the site'south icon in the left-manus sidebar.
On this screen, y'all can see a listing of all your local WordPress sites. To add together another site, simply click the "Add together Site" button.
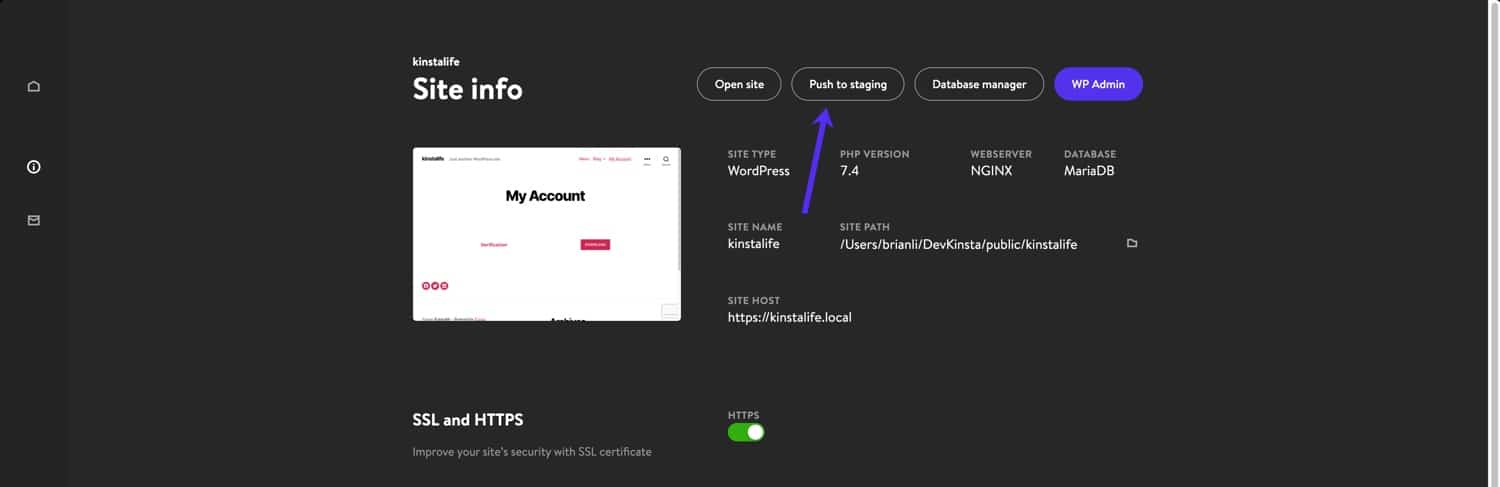
MyKinsta Integration in DevKinsta
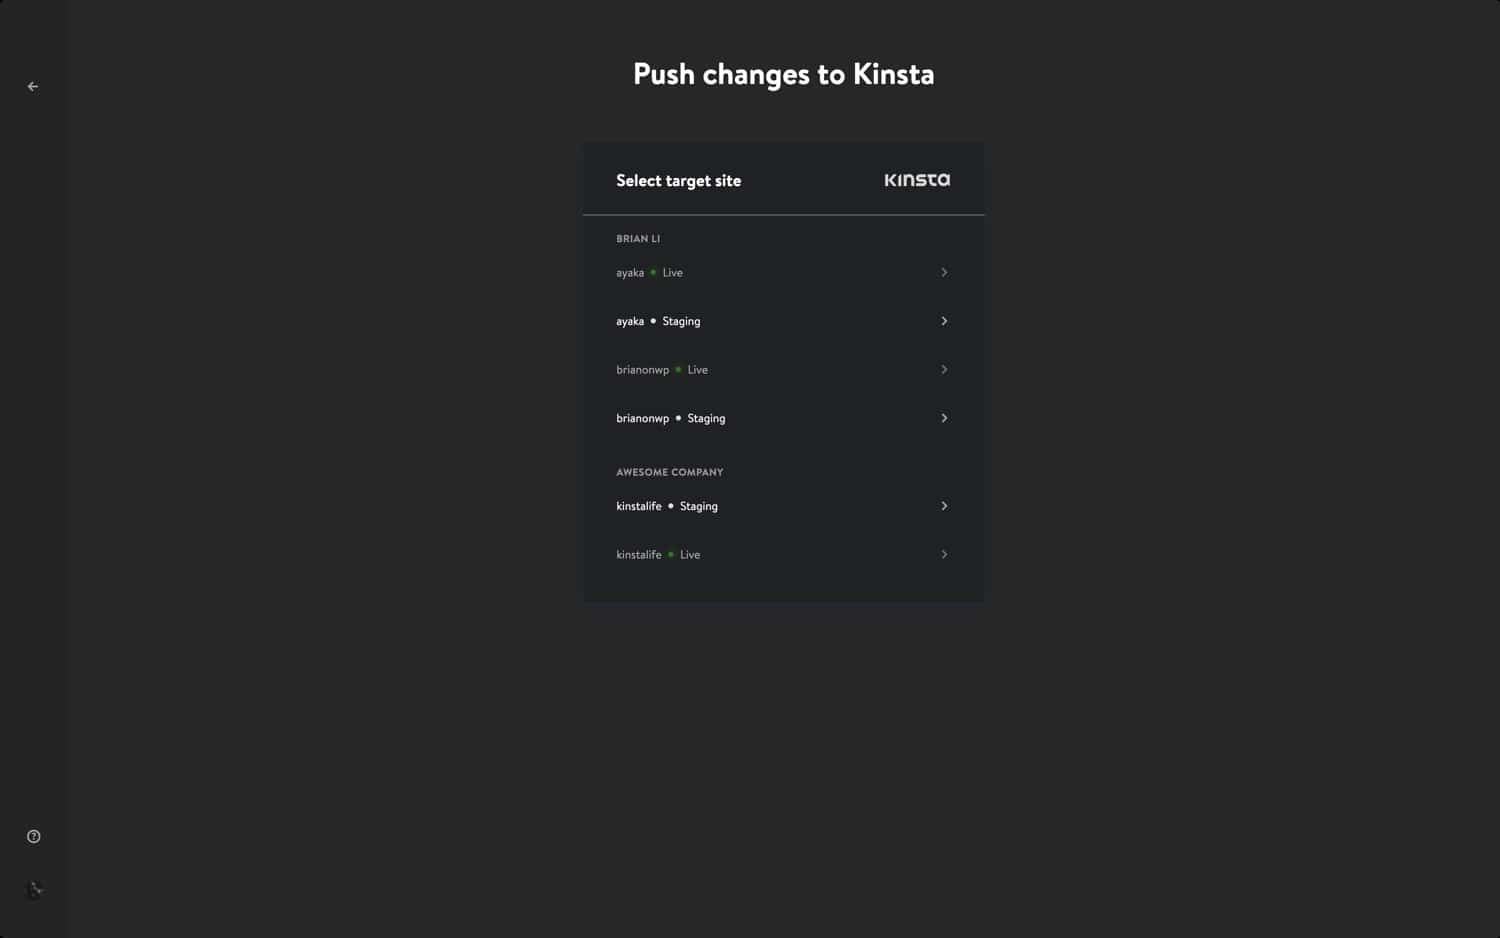
For users with WordPress sites hosted on Kinsta, DevKinsta makes it easy to push changes online to a Kinsta staging environment. To push a local site to Kinsta, just click the "Push to Staging" push button on your "Site Info" folio.
If necessary, you volition be prompted to enter your MyKinsta credentials.
You will then demand to select a target site to button to. Keep in mind that this process will overwrite the contents of the current staging environs if i exists.
Finally, click "Push to Staging" to confirm the activeness.
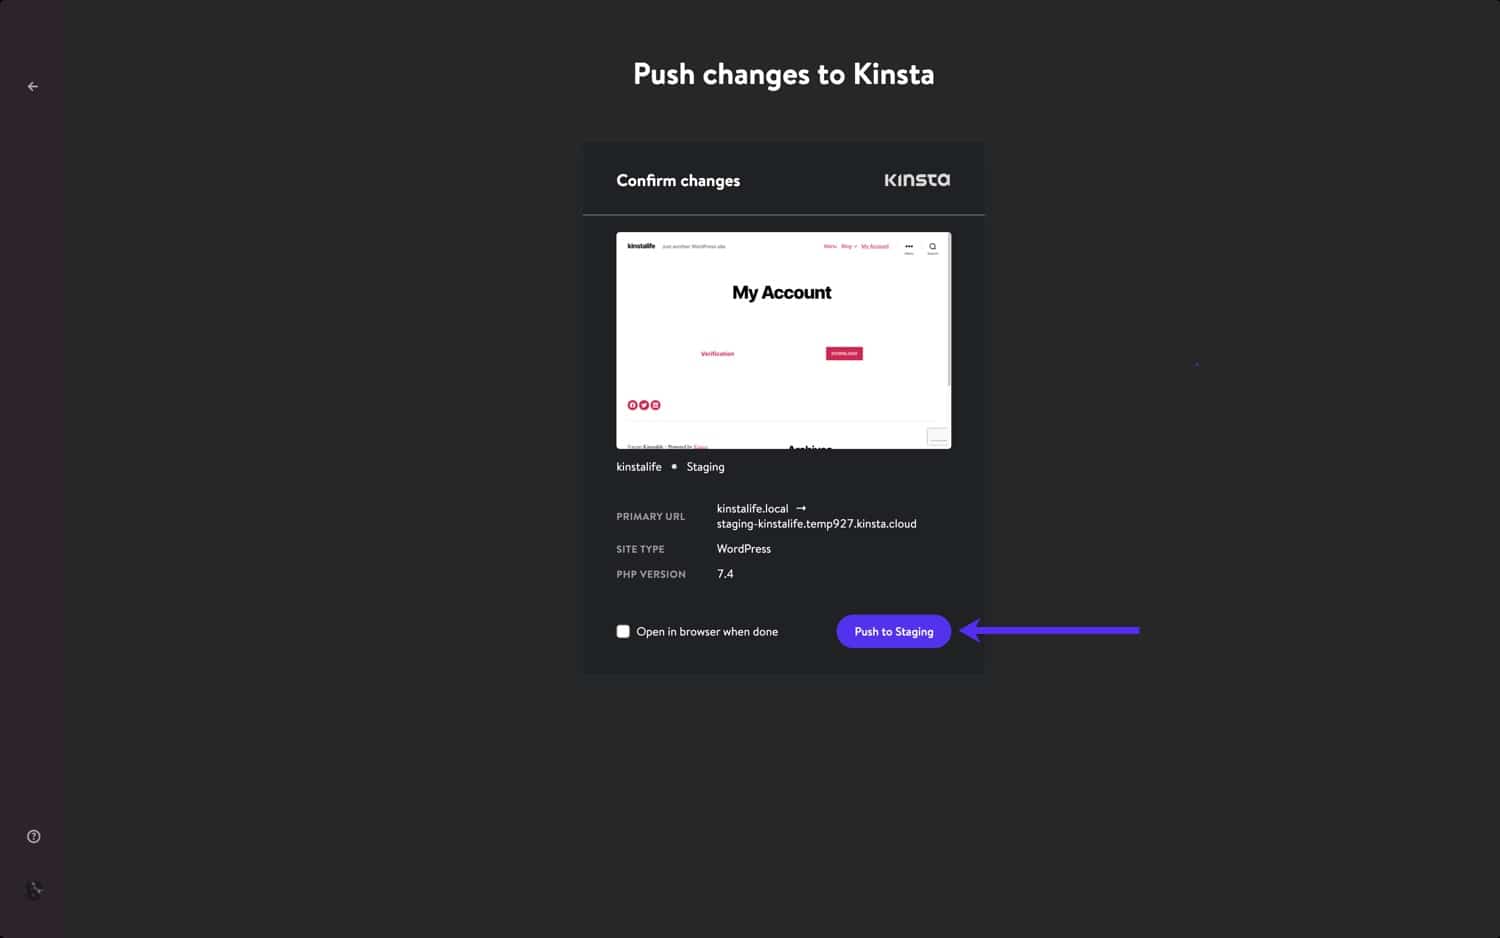
Afterward pushing your local WordPress site to Kinsta, you can then view the site via the staging environment URL. If necessary, you can and so push button staging to live in MyKinsta.
How to Use Adminer to Manage Your Database
DevKinsta ships with a lightweight database direction tool called Adminer. Like phpMyAdmin which nosotros use for sites hosted on Kinsta, Adminer provides you with a spider web interface to edit database tables, run database queries, import and export backups, and more than.
To launch Adminer, click the "Database Manager" button at the pinnacle of the "Site Info" folio. Adminer will then open in your default web browser.
After launching Adminer, yous'll see your WordPress database's tables. The screenshot beneath shows the database of our "kinstalife" test site. Under the "Table" column, you can see the default WordPress tables like wp_comments, wp_posts, etc.
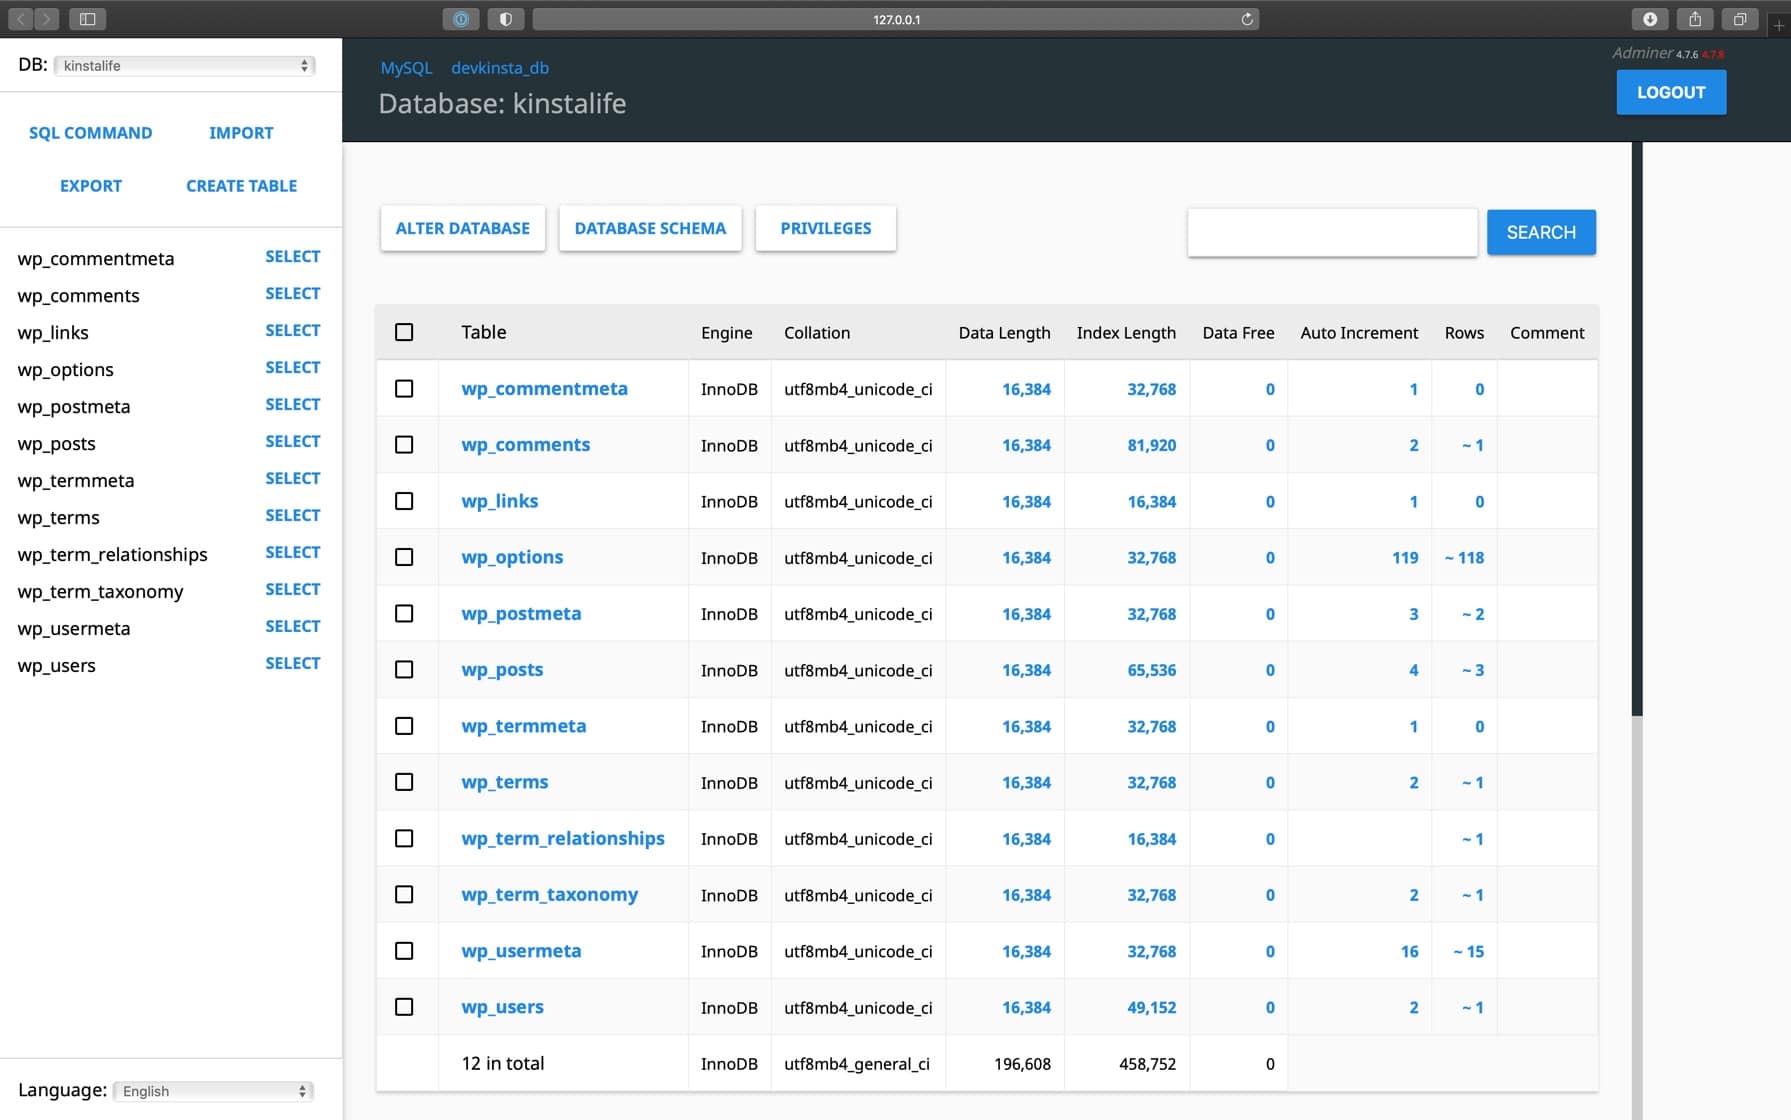
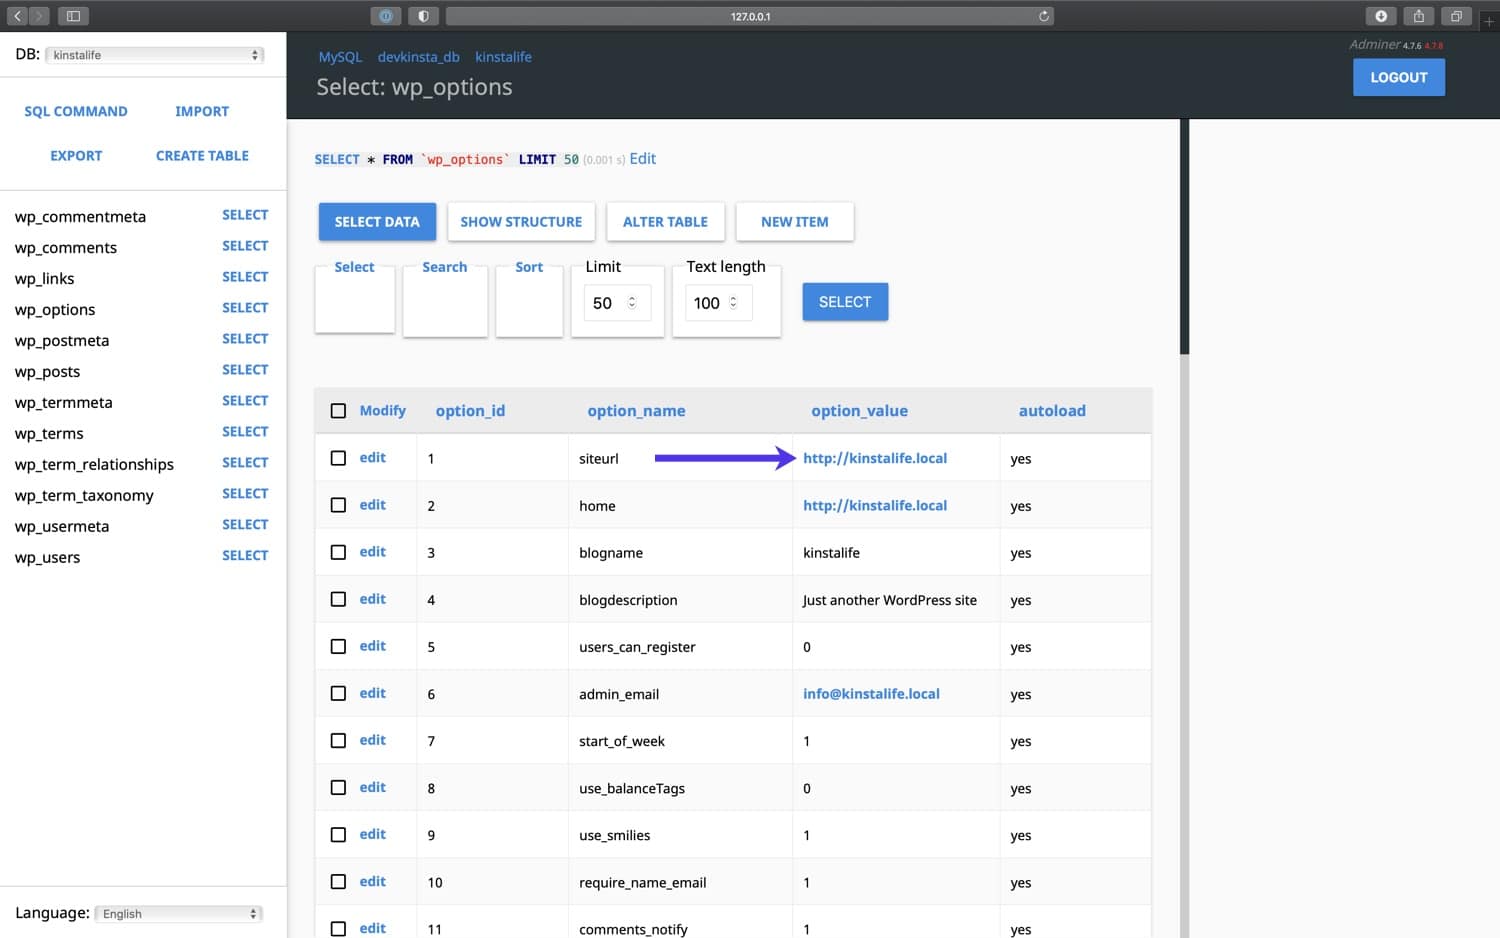
To edit a database entry, click on the desired tabular array. For example, if we want to edit the dwelling house and ite URL of our WordPress site, we can click on the wp_options tabular array.
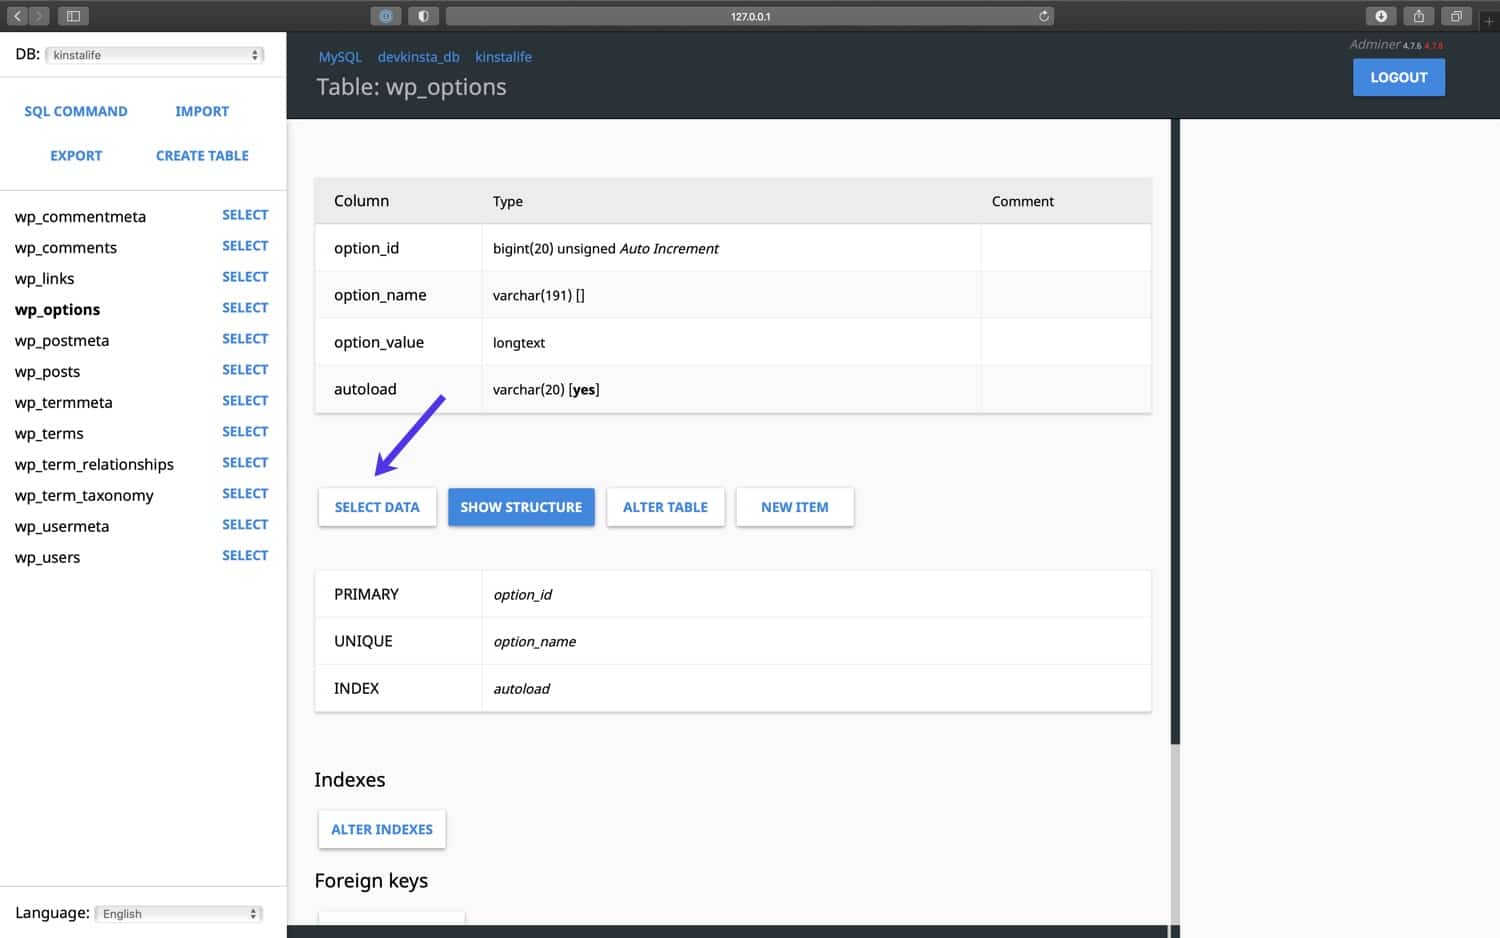
On this page, we can edit the option_value for siteurl to update the site URL of our WordPress site, and the same can be done for the dwelling house URL likewise.
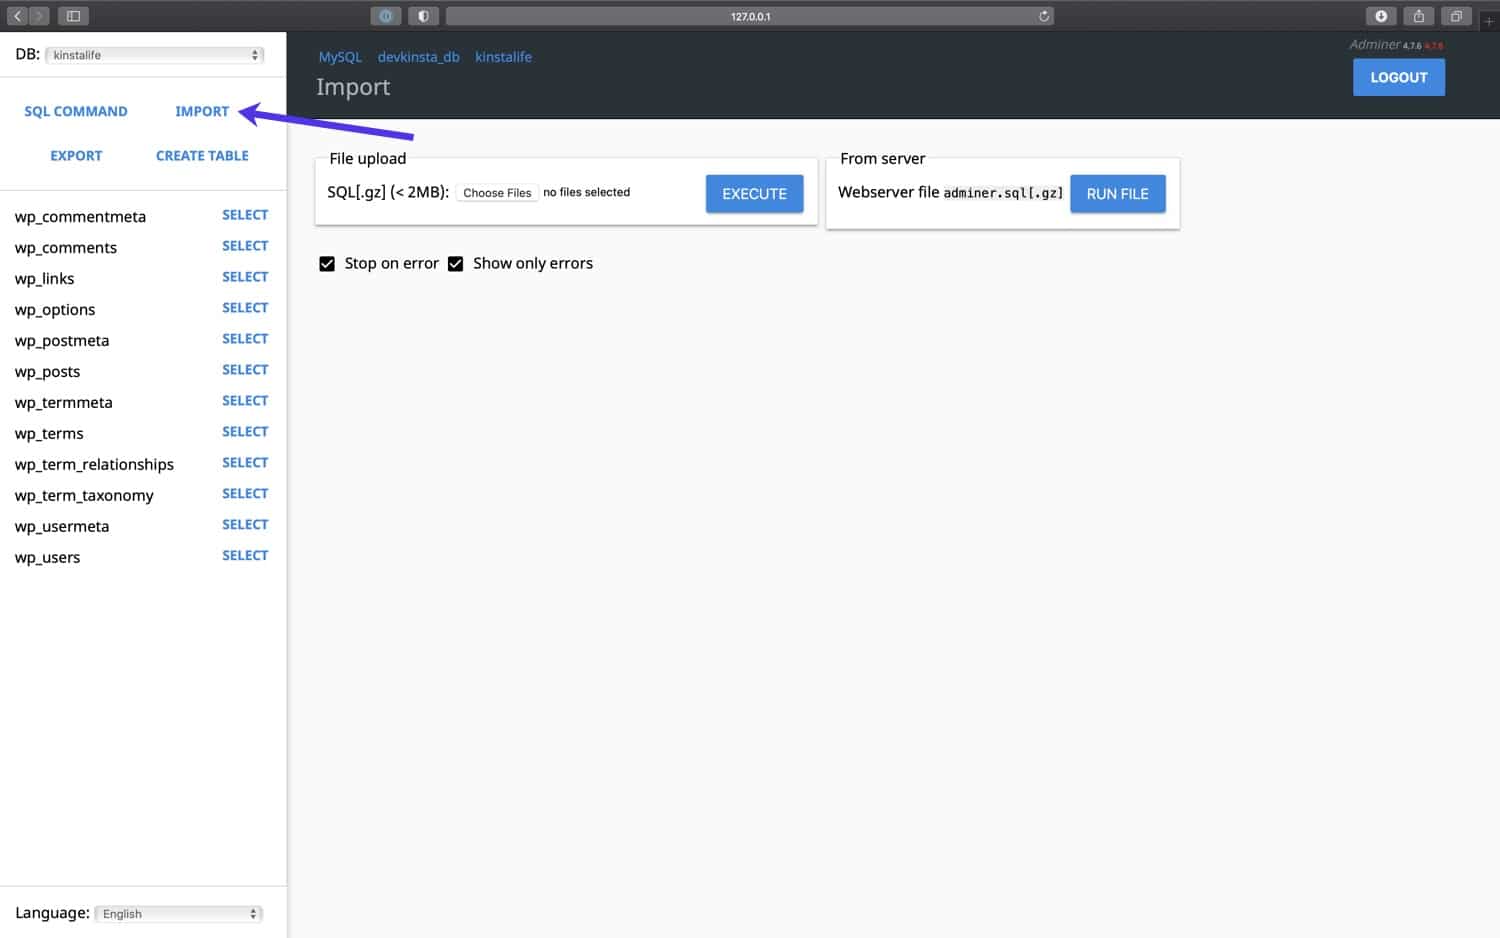
Adminer likewise supports database import and consign likewise. This is useful for working with database backup files like the ones we include with downloadable backups.
To import a database file, click "Import" in the upper left corner of Adminer. Click on "Choose Files" to select a database backup, and click "Execute" to showtime the import process. Adminer supports both raw .sql files as well compressed .sql.gz files.
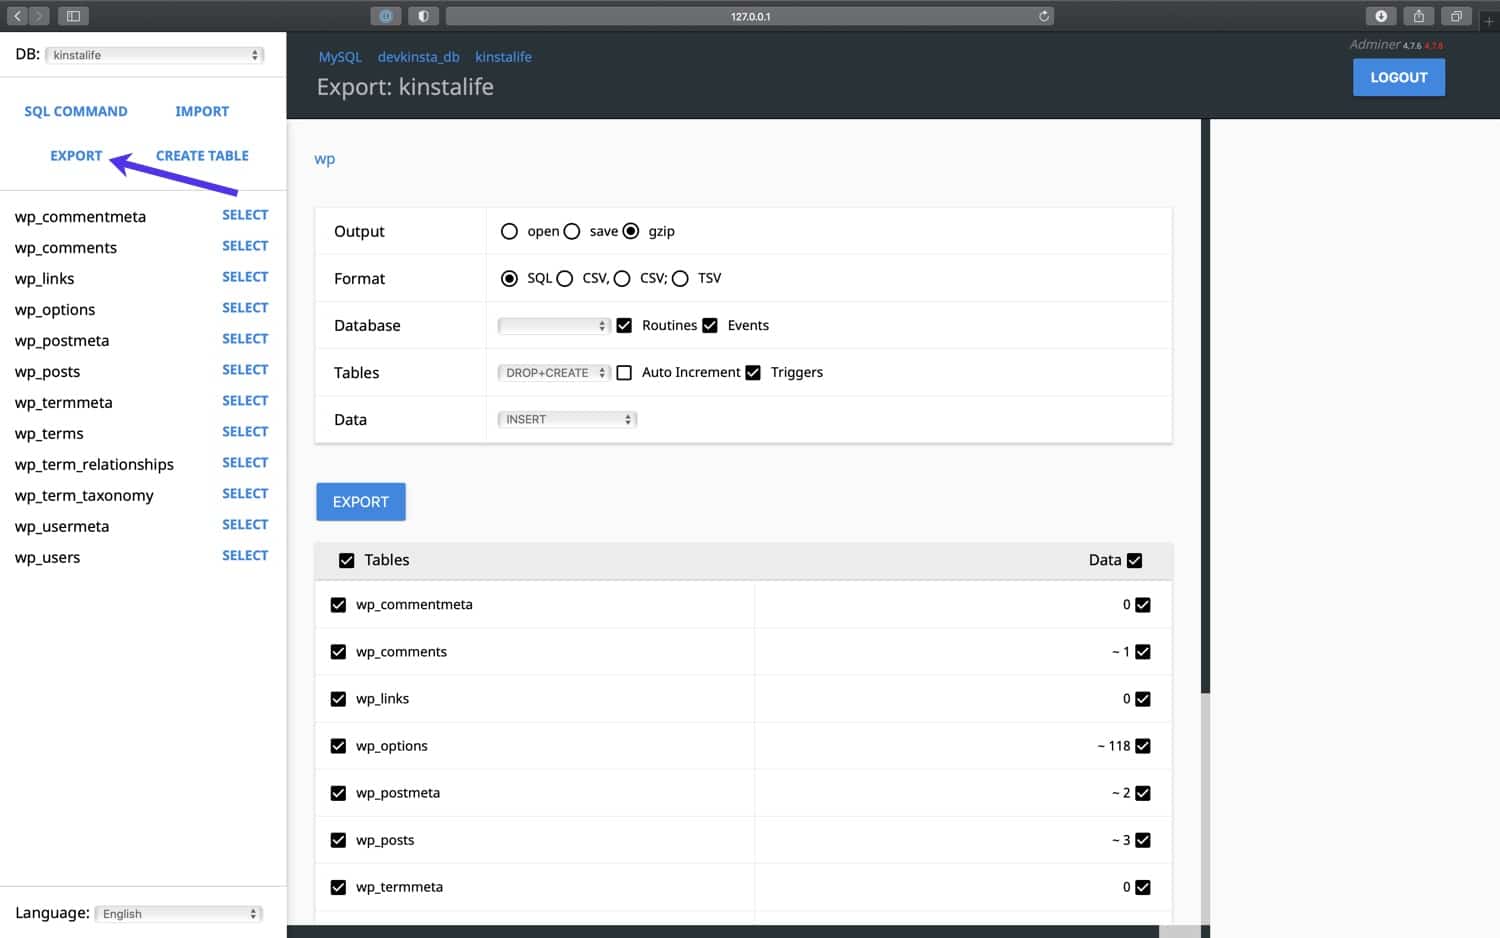
To consign a complete database backup, click "Export" in the upper left corner of Adminer. Select "gzip" for the output format, "SQL" for the database format, and go out the other settings every bit is. Click "Export" to first the fill-in process.
Adminer will so export your WordPress database to a compressed .sql.gz file.
Finally, Adminer supports SQL command execution, which means you tin run database queries on your WordPress database. For example, if you're trying to find the amount of autoloaded data in your database, you tin run a SQL command below in Adminer.
SELECT SUM(LENGTH(option_value)) as autoload_size FROM wp_options WHERE autoload='aye'; To run a database query, click "SQL Control" in the upper left corner of Adminer. Specify a database query, and click "Execute" to run the control.
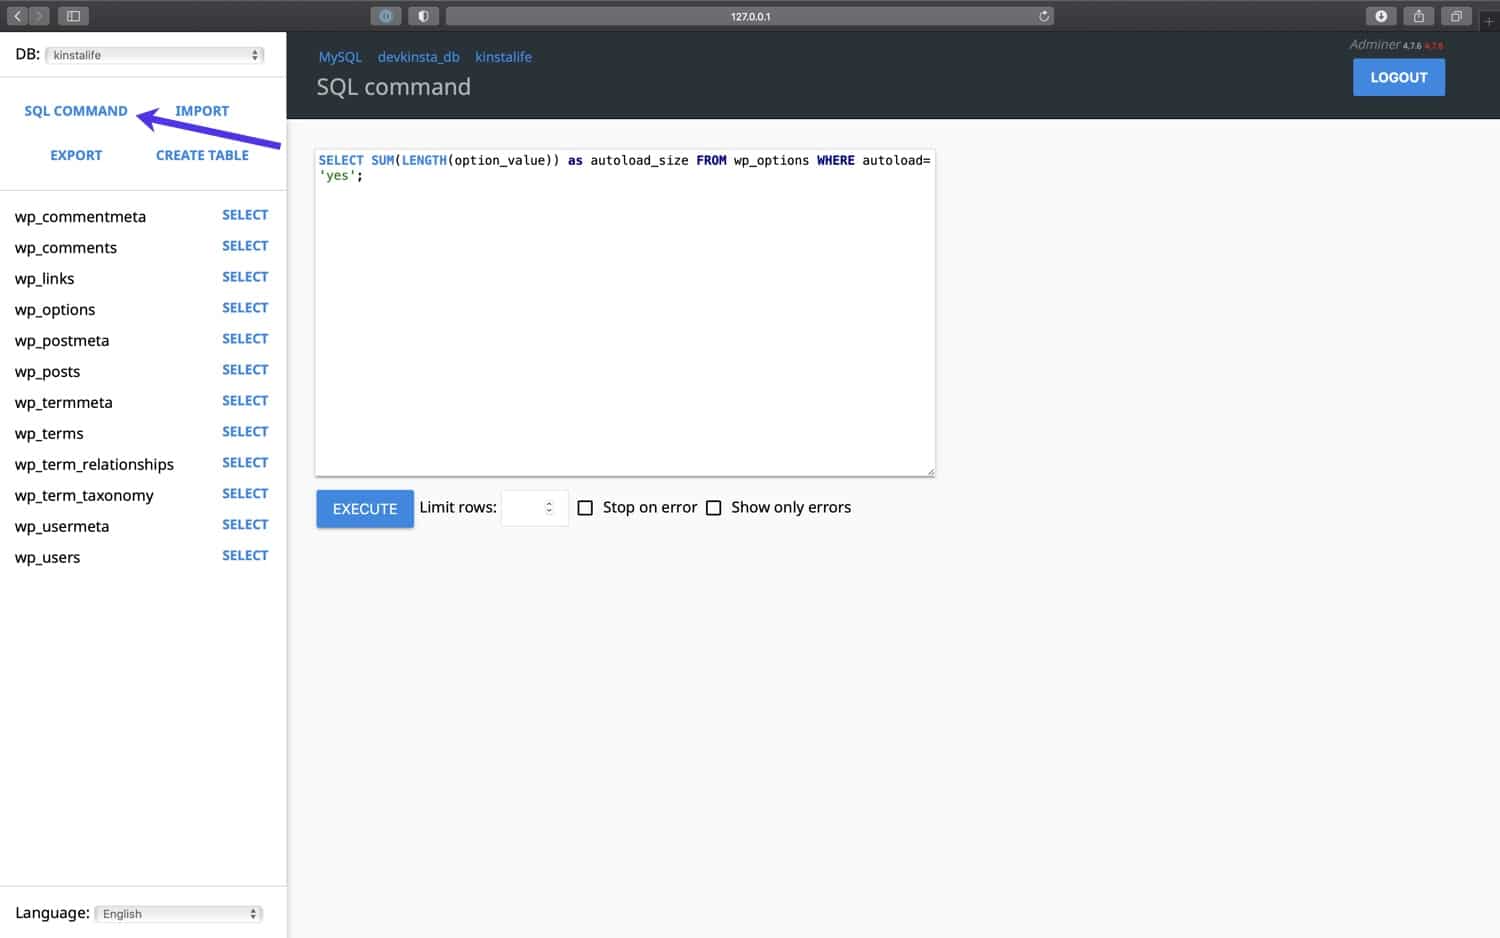
With DevKinsta's Adminer integration, you have advanced command over your WordPress database.
Whether you demand to edit database tables, import or export backups, or run complex SQL commands, DevKinsta has got you lot covered!
How to Inspect Outgoing Electronic mail From WordPress
DevKinsta includes a built-in SMTP server and email capture tool. This allows your local WordPress sites to send outgoing emails like a live production site. Yet, sent emails will be captured and stored in DevKinsta'south e-mail inbox.
This gives yous the best of both worlds – yous can utilize DevKinsta to test outgoing electronic mail functionality for marketing automation workflows, WooCommerce lodge confirmations, and more without spamming the electronic mail inboxes of your visitors and customers.
To admission DevKinsta's email inbox, click on the mail icon in the left-hand sidebar.
In the electronic mail inbox, y'all'll encounter a list of outgoing emails that were captured. In the screenshot below, y'all tin see an outgoing email from our "kinstalife" test site.
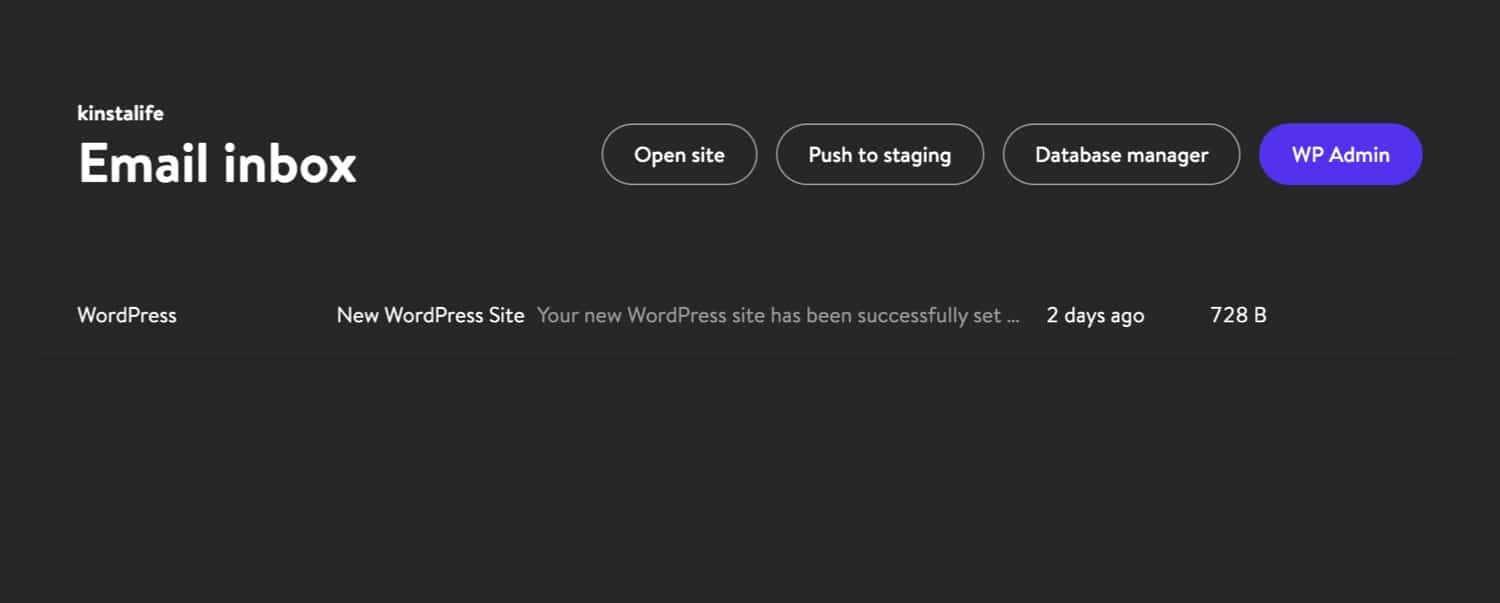
To inspect an outgoing e-mail, just click on it. For each e-mail, DevKinsta lets you lot inspect the "from accost", "to accost", body content, time of delivery, and more.
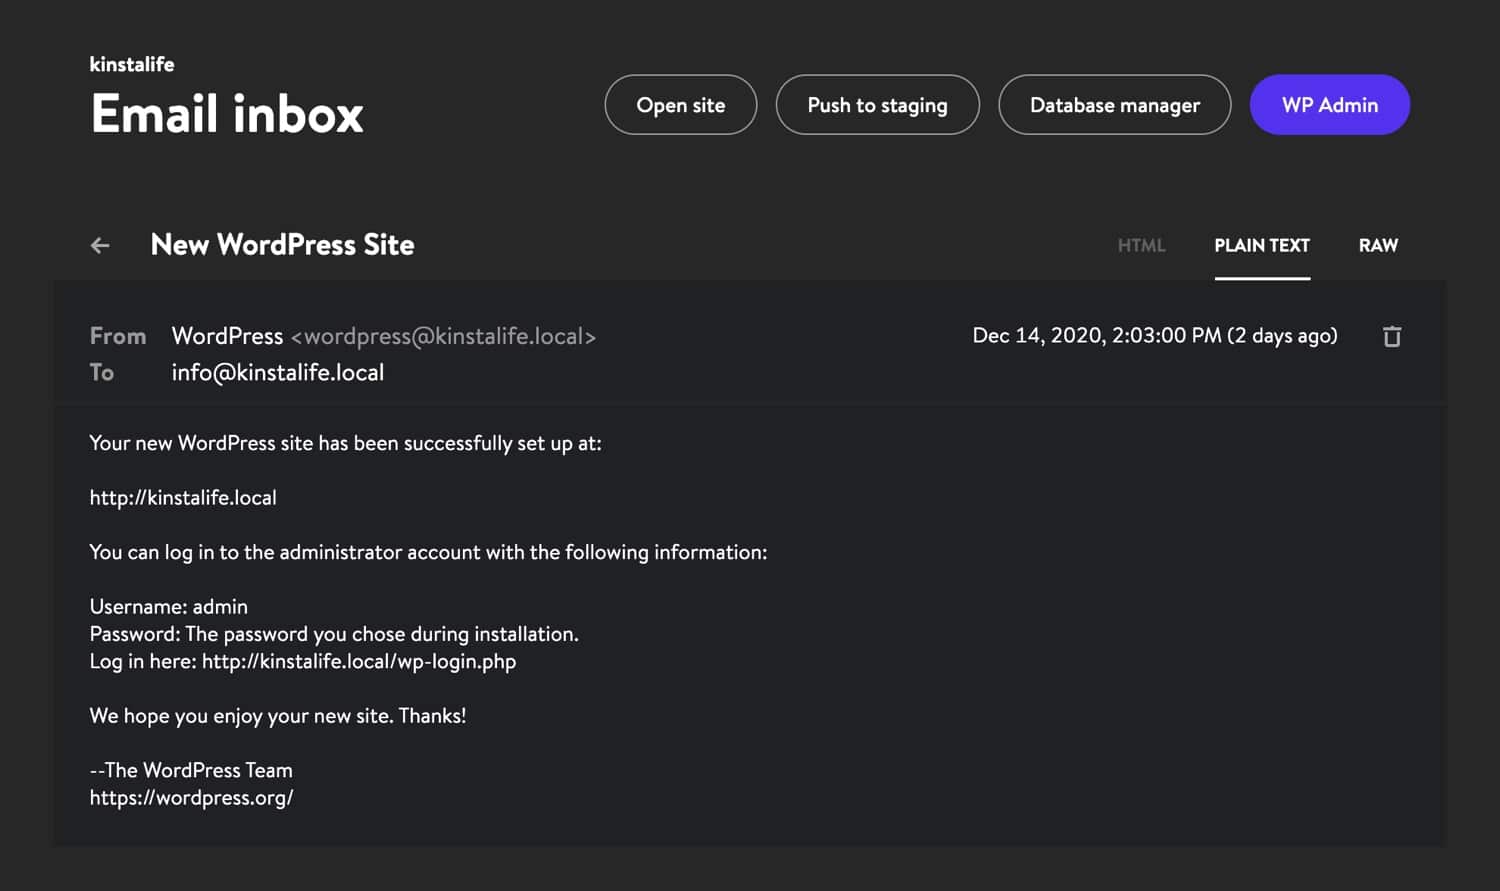
You tin can also choose to display the electronic mail in HTML, Patently Text, or Raw mode. The HTML mode is useful for testing out HTML electronic mail templates, while the Raw mode lets yous inspect email headers like MIME-Version and X-Mailer direct.
To larn more about DevKinsta, be sure to join the official community forum and read the DevKinsta documentation.
How to Install WordPress Locally With DesktopServer
DesktopServer is a swell WordPress production by ServerPress, which can make installing WordPress locally a consummate breeze:
Y'all can launch a new development install in a matter of seconds with the uncomplicated click of a button. This tool as well fully supports multisite and WP-CLI, and works on both Windows and Mac.
ServerPress has both a costless version and a premium version, the latter costing $99.95 per yr. The premium version includes a few advanced capabilities, such as:
- Multisite support
- Importing and exporting third-party backups
- Deploying directly to your live site
- Bypassing any login plugins
You tin choose which version fits you best depending on your needs. If you lot only demand to practice some quick testing, the costless version works well.
Pace ane: Download DesktopServer to Your Calculator
To install WordPress locally, you will first demand to download DesktopServer from its website. There is both a Windows version and a Mac version. For this example, we volition be using the Windows version.
On the website, click the Free Download button in the acme right-hand corner (or Buy Premium if that's what you prefer):
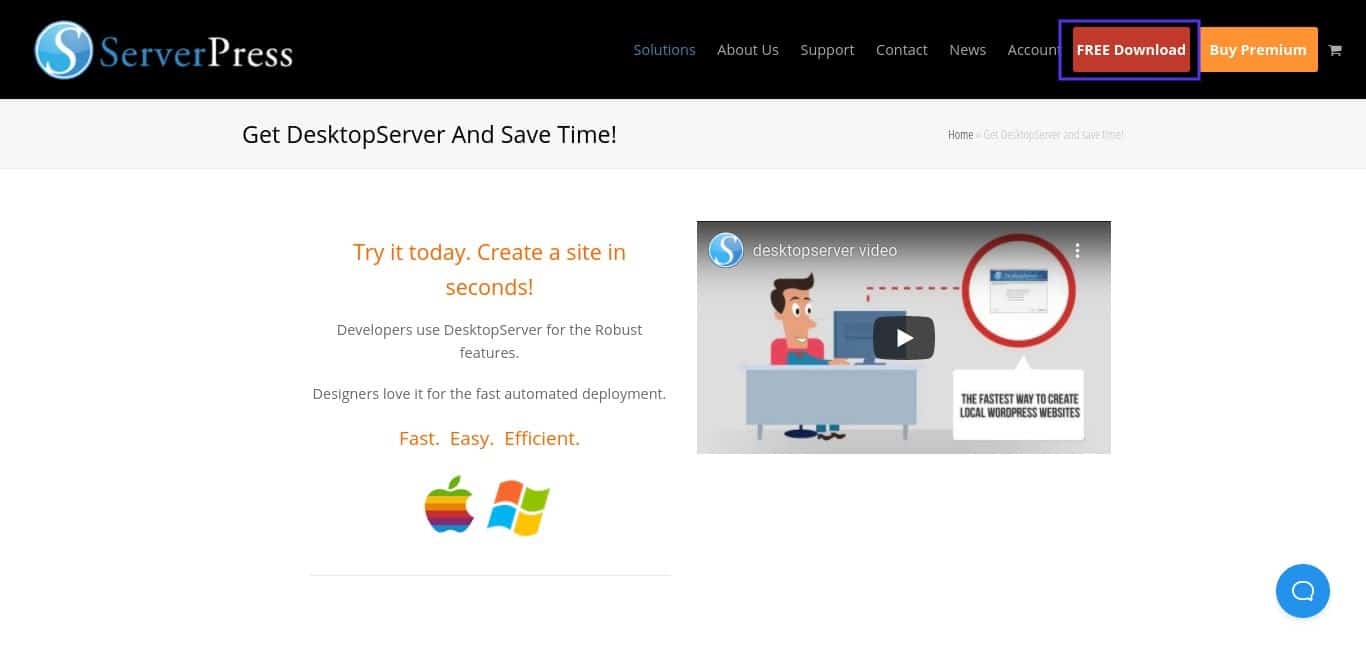
This will automatically begin downloading the .nada file to your computer.
Step two: Launch the DesktopServer Installer
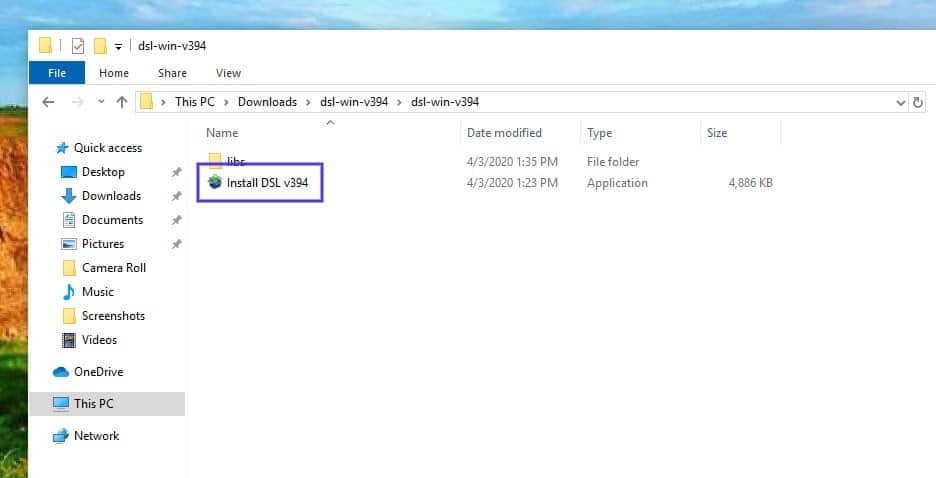
Once the file is done downloading, the next step is to launch the DesktopServerinstaller. Before you do that, unzip the file y'all but downloaded. This may take a few minutes to complete.
One time that'due south finished, click on Install DSL:
When yous starting time launch the program, you will be prompted to restart with administrator privileges. Select Continue. You'll then be prompted to accept the terms of services, and choose an choice for your installation:
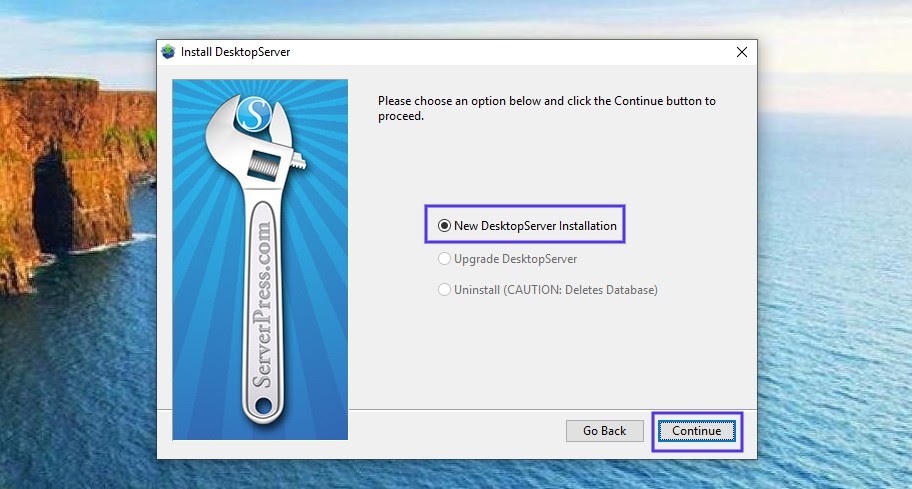
Exit New Desktop Installation selected, then click on Continue. The installation process will begin, which can accept a bit of time.
When it's finished, it will present a popup letting y'all know that it'southward complete. It also tells you where in your computer directory you can find the application. When you're done, click on Finish.
Step three: Enable Plugins and Start Apache and MySQL Services
Once the installation is complete, you can enable a multitude of unlike developer plugins:
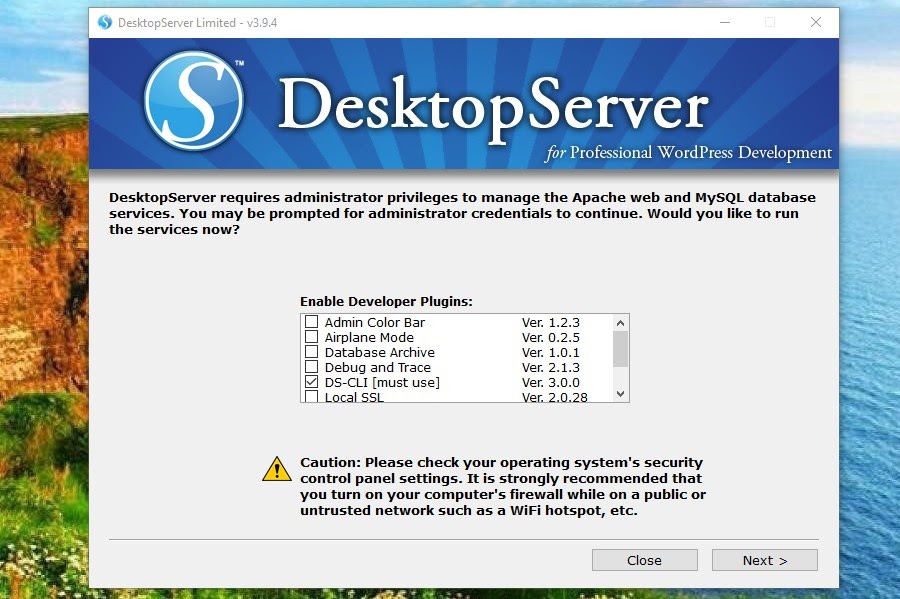
Here's a quick rundown of the developer plugins you tin use when yous install WordPress locally. We highly recommend the bypass login and DS-CLI plugins.
- Aeroplane mode: Control loading of external files when developing locally.
- Featherbed login: Allows developer bypass of login credentials, via quick selection of any of the start 100 usernames in a combobox.
- Clean Import: Resets .htaccess, clears enshroud from tertiary-party hosts
- Debug and Trace: Forces WP_DEBUG = true, and enables cross-platform/linguistic communication trace statements in PHP and JavaScript.
- Dreamweaver Support: Enables automatic Dreamweaver project file creation, and a WYSIWYG mode when working on template files and mode.css.
- DS-CLI: This is an enhanced, cross-platform, command-line interface for professional developers. It lets you easily employ CLI, Composer, Git, and PHPUnit. NodeJS and NPM are included to let installation of GRUNT, Gulp, and other Node dependencies.
- DS-Deploy: Used to move a site from a local DesktopServer install to a live server.
- InnoDB Autoconvert: Convert a site'southward tables to InnoDB on Create, Re-create, Movement, and Import operations.
- Local Admin Colour Bar: Changes the Admin bar color.
- Mailbox Viewer: Provides quick developer offline viewing of postal service delivery services.
Keep in mind that some of these options are just available with the premium version. When you're washed, select Side by side. Yous'll then exist asked if you lot want to start web and database services, and so striking Next once again.
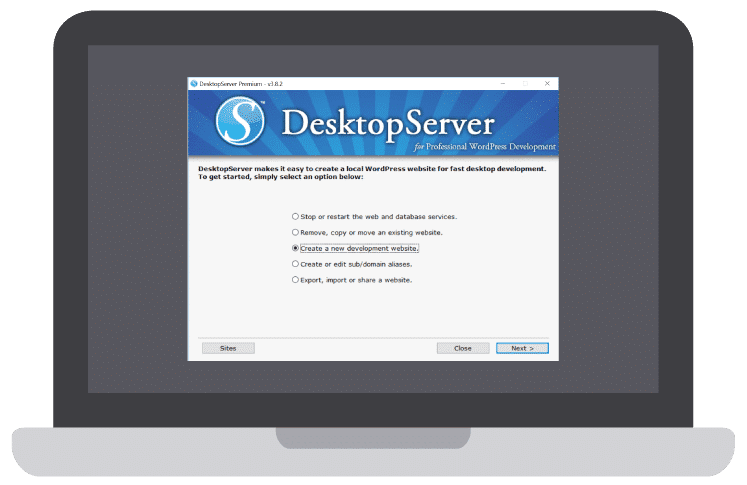
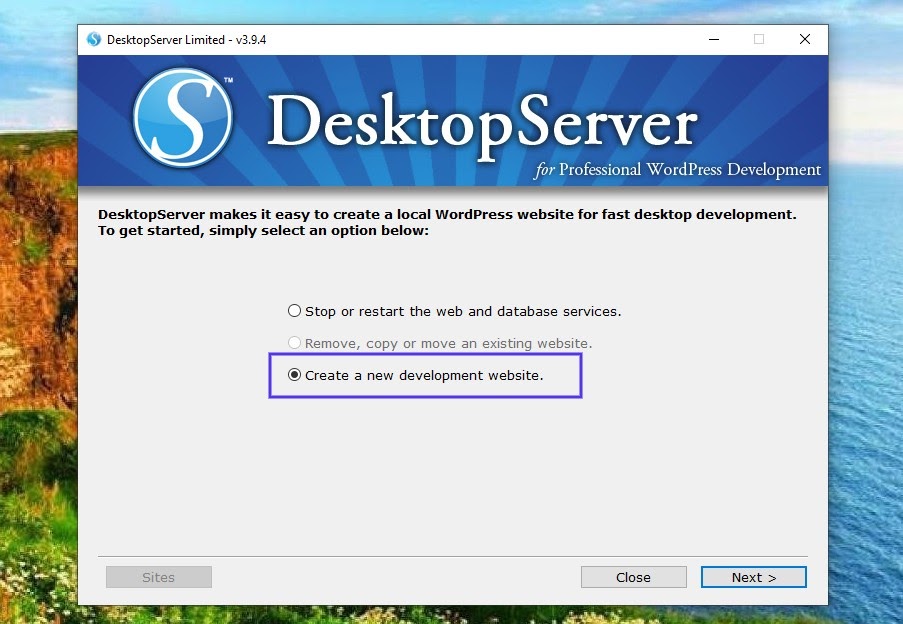
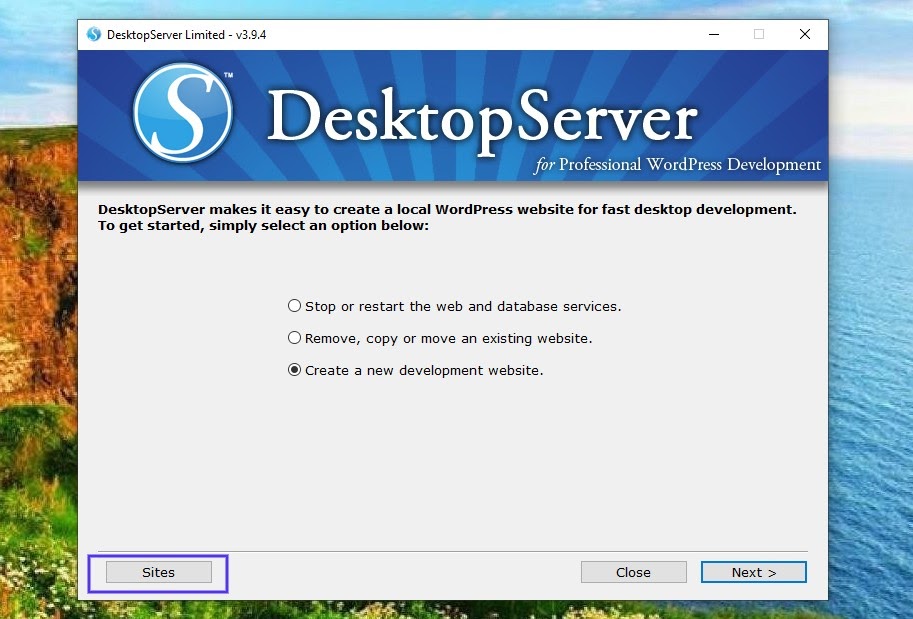
Stride 4: Create a New Development Site
When you're done enabling plugins and starting the web and database services, the next prompt will be to select Create a new evolution website:
Subscribe Now
This is where the program will install WordPress for you. Yous'll accept to pick your site's name, which volition as well exist its local address. Nosotros are calling ours "testsite", so our development URL will be "testsite.dev" on our local car:
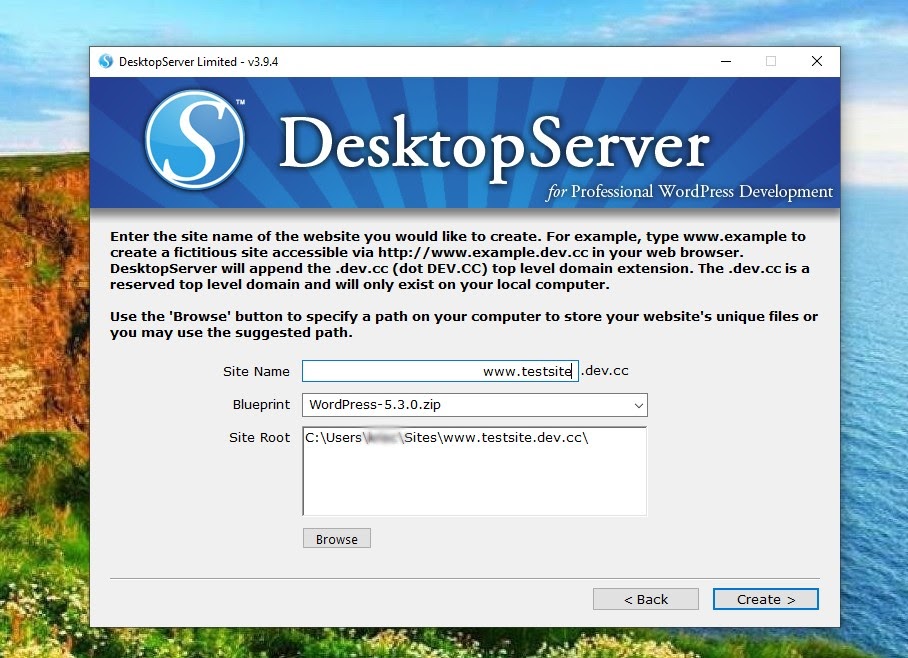
DesktopServer enables you to actually create dissimilar blueprints, making it almost like a pre-built template. In our instance, notwithstanding, we just desire a fresh install.
DesktopServer always has the latest version of WordPress as the default blueprint. This means you lot don't have to worry nigh manually downloading it from the repository and unzipping it.
Past default, the site'due south root is located in your My Documents binder. If you lot're happy with this, you can exit it as is. However, for ease of organization, we changed ours to a folder we created in the root of our C: drive called "wordpress".
When you are prepare, click on Create. You'll then see the URL of your local WordPress install. Click on that to terminate upwardly the installation.
Step 5: Install and Configure Your WordPress Site
When you click on the link we just mentioned, your local WordPress site will open up in a browser tab:
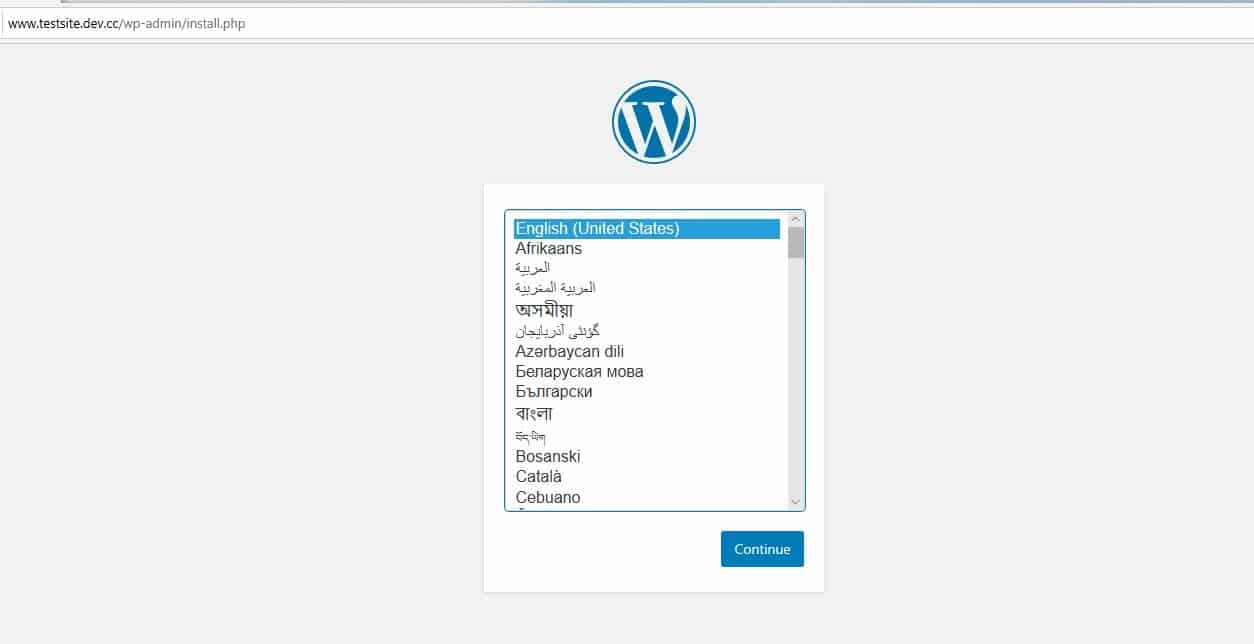
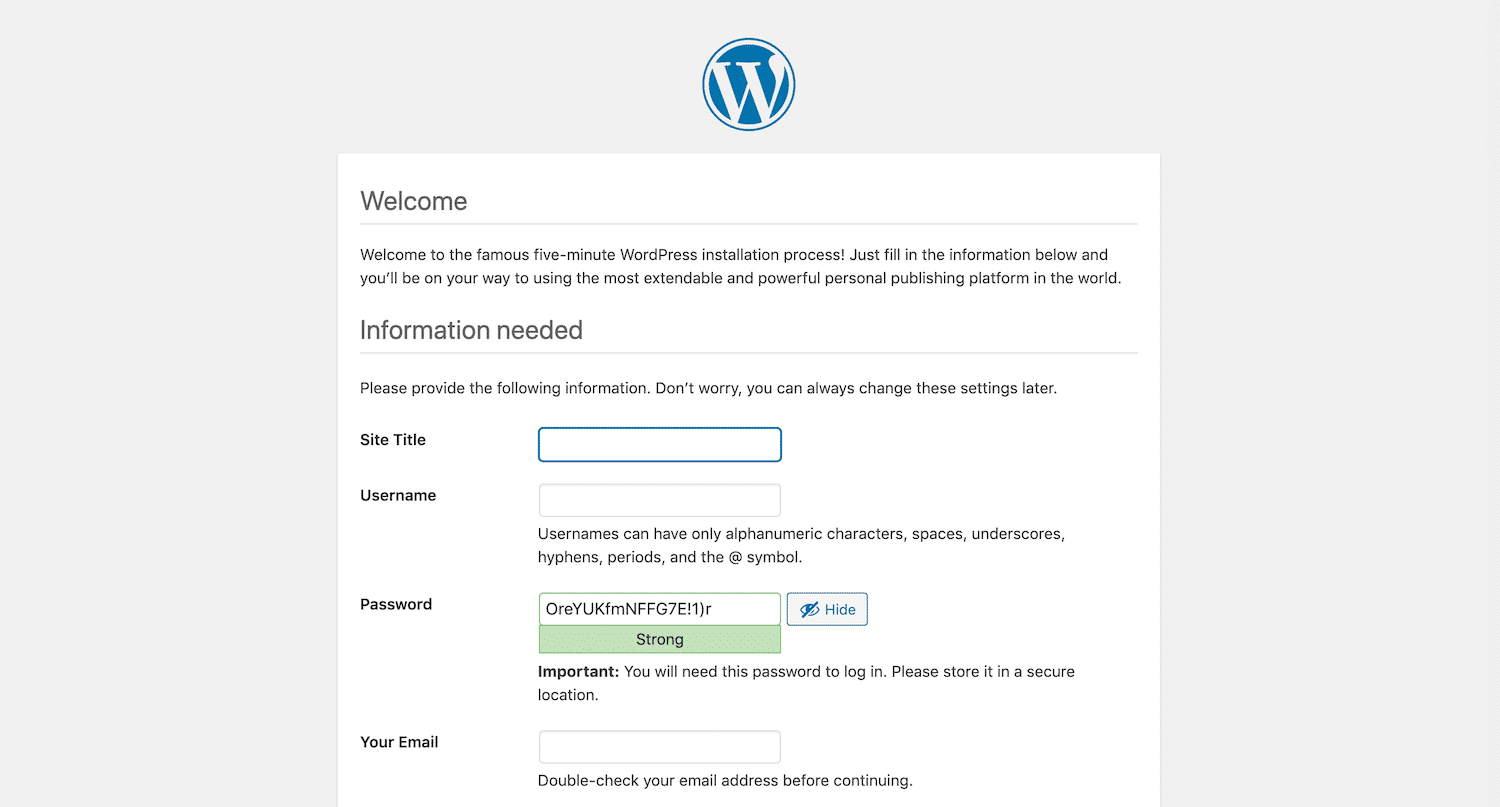
Afterward you lot choose your language, the next pace is to requite your site a title and choose a username (if you lot plan to make the site live later, don't use "admin" as a username, which you tin can read more about in our WordPress security guide), a stiff password, and your email address:
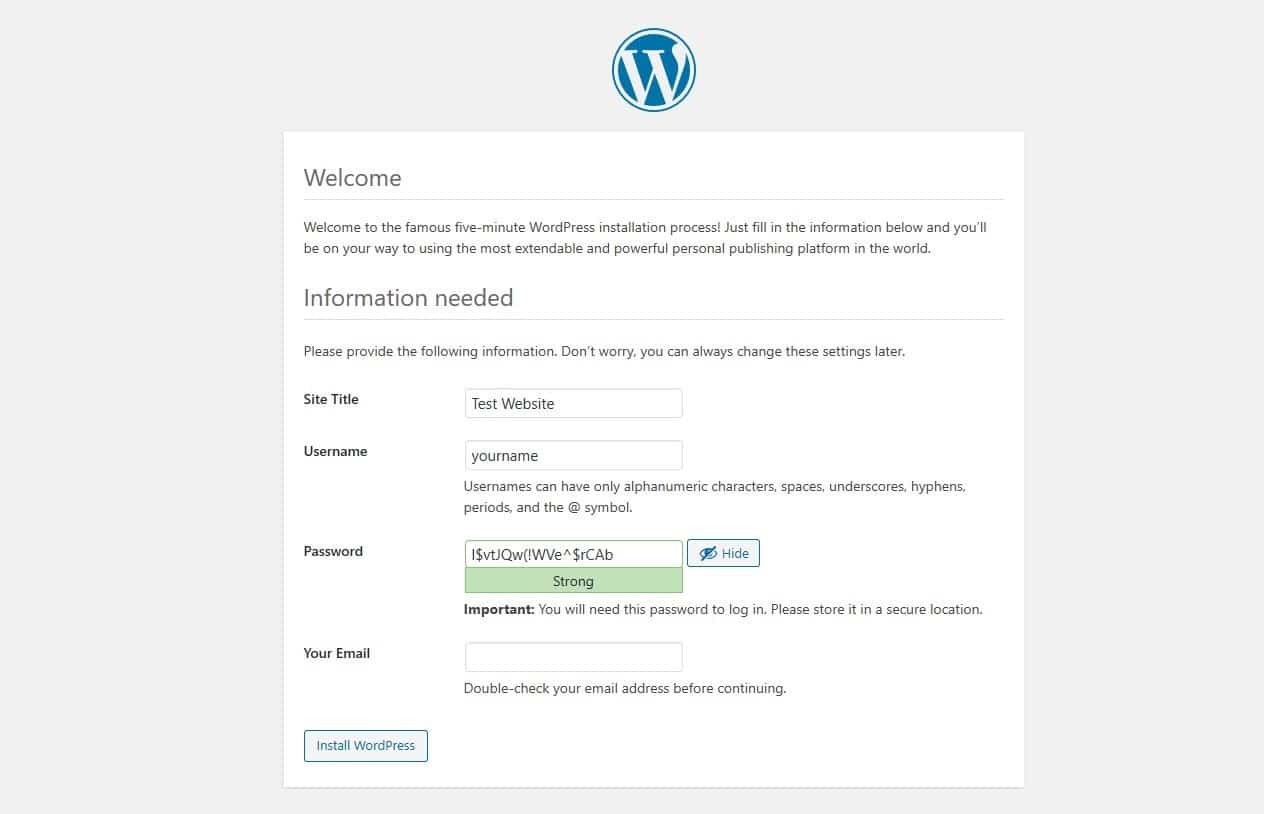
When you lot're done, select Install WordPress. That'due south it! You merely installed WordPress locally and your site is up and running. You can at present browse to your local install and test away.
In our case, we'll go to "testsite.dev" in our browser'southward accost bar. Since we selected the bypass login plugin feature during setup, at that place is a dropdown menu where we tin can select our admin and be automatically logged in. Obviously you lot won't use this on a production site, but information technology's super handy for a dev environment.
Additional Tips for Using DesktopServer to Install WordPress Locally
Because of how Windows handles its file permissions, yous may or may not meet a message upon logging in most WordPress failing to update:

To fix, this but open up the control prompt equally an ambassador and run the post-obit command inside your WordPress directory folder:
attrib -s *.* 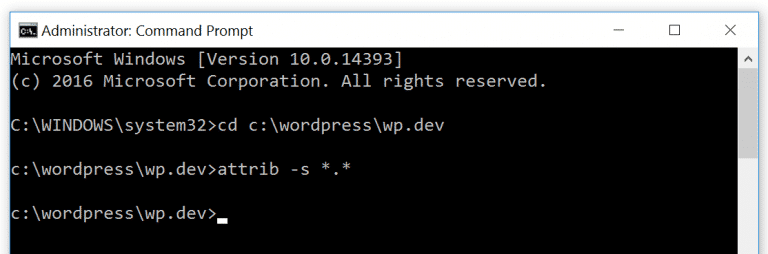
If yous need more guidance or instruction on how to do this, yous tin learn more most the details on ServerPress.
To create additional WordPress sites or edit them, simply launch the DesktopServer.exe file again. You lot can cease and restart services, create new sites, edit them, consign and import them, etc. To admission phpMyAdmin, you can click on the Sites push on the lesser left:
Alternatively, you can enter "localhost" into your browser'southward address bar. This volition bring upwardly the administrator interface on the localhost:
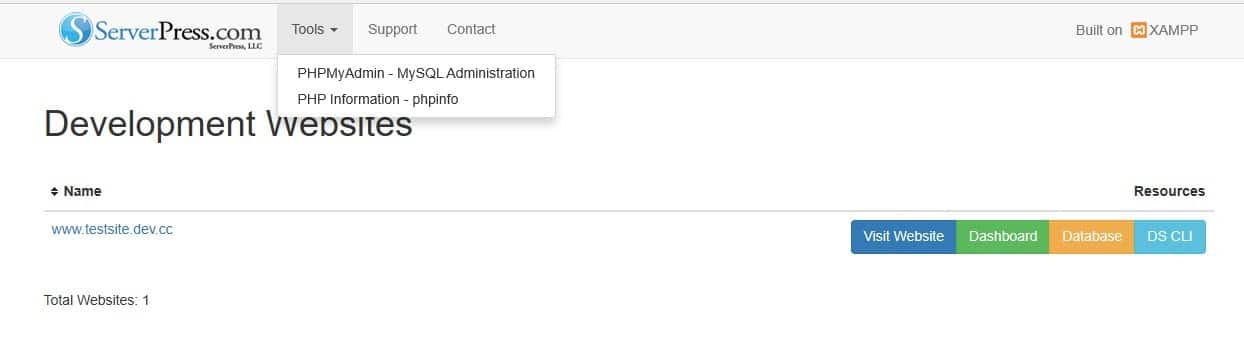
In that location, you lot can get the links to all of your WordPress sites, equally well as dashboard links and phpMyAdmin links.
Some other awesome feature is the ability to launch WP-CLI (or DS-CLI) with a unmarried click. If you selected the DS-CLI selection during the setup process above, there volition be a link for information technology within your dashboard. But click on it, and yous can start firing up WP-CLI commands.
DesktopServer likewise includes an consign characteristic, which allows you to export your WordPress site direct to a live site or .zero file. Note that you volition need the premium version for this.
How to Install WordPress Locally on Windows Using WAMP
If yous want to install WordPress locally on a Windows computer, you tin can also practise then with WampServer, too known as WAMP. WAMP is a software that bundles Apache web server, PHP, and MySQL specifically for Windows devices. Let's have a look at how to utilize information technology to install WordPress locally.
Footstep one: Download and Install WAMP on Your Computer
The offset step is to download and install the WAMP software to your computer. You tin can do this by visiting the WampServer website and selecting Starting time Using WampServer:
This volition automatically bring you to the downloads section of the site, where you will have two versions to choose from: WampServer 32 scrap and WampServer 64 scrap. Select the ane that is recommended for your operating organization.
If you're unsure whether your OS is 32 flake or 64 bit, you can discover this data past navigating to Settings > About:
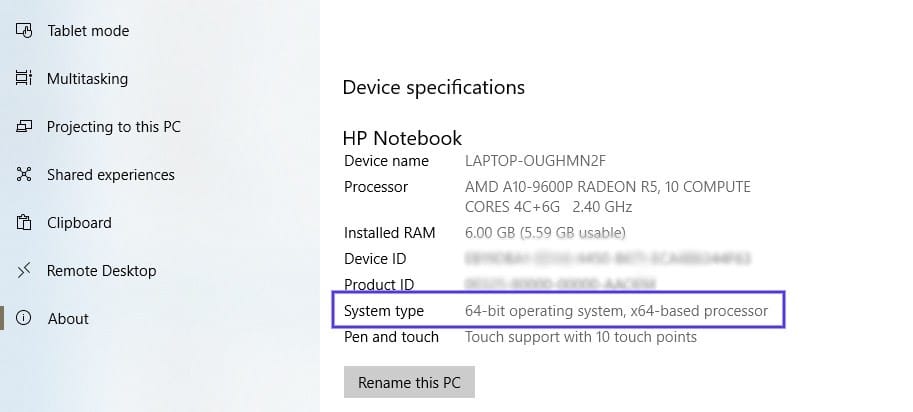
Under the Device specifications section, you will be able to detect out your Bone blazon.
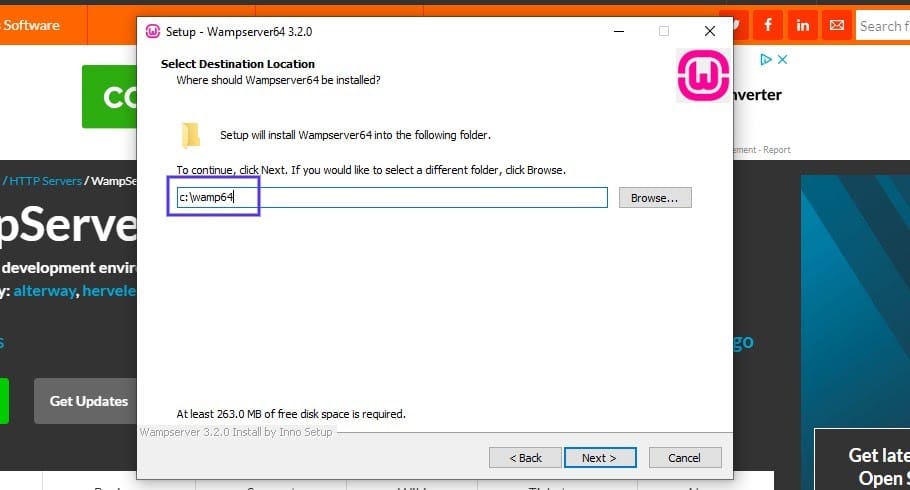
Footstep ii: Run the Wampserver.exe File to Outset the Installation
After you download the software, click on the wampserver.exe file to run the installer. This may take a infinitesimal or two.
Besides, brand note of where this file downloaded to, as you lot'll demand to revisit it later:
You'll be prompted with a serial of instructions on the screen to consummate the installation process.
During this process, you'll be asked to define a web browser. You can always change this option to a browser yous prefer by navigating to the Program Files of your calculator.
Footstep 3: Create a New MySQL Database
The next step is to set upward a bare MySQL database. After you launch WAMP, in that location will exist a green icon in the lesser correct-hand corner of your screen.
Click on the icon, followed past phpMyAdmin. This will automatically bring you to the login screen in your browser:
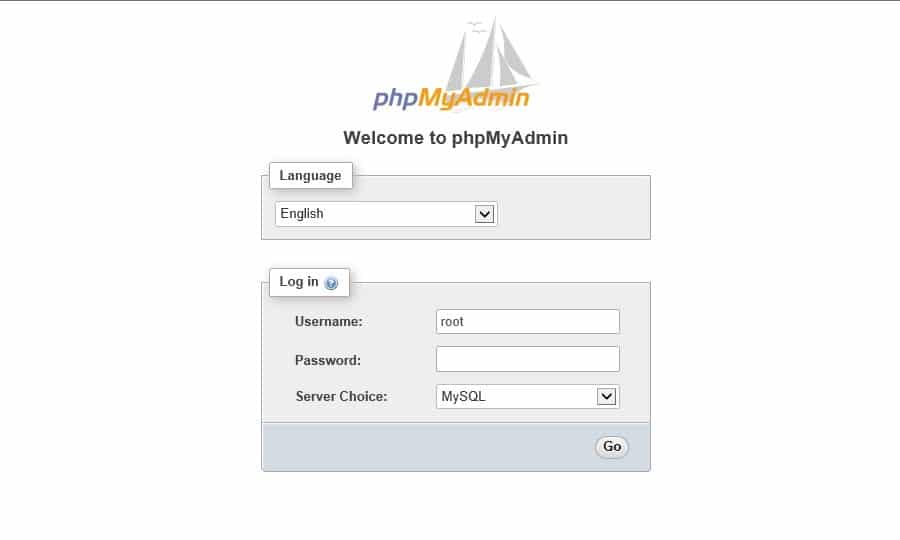
In the username field, input "root", leave the countersign field empty and then select the Go button. Next, click on Databases:

Under the Create Databases section, you will need to proper noun your new database. Next, click on Create. That's it. You now have your database set up up.
Stride 4: Install WordPress and Extract the Files
In one case y'all're done creating your database, the next pace is to install WordPress locally. To do this, visit WordPress.org and click on Get WordPress, followed by Download WordPress:
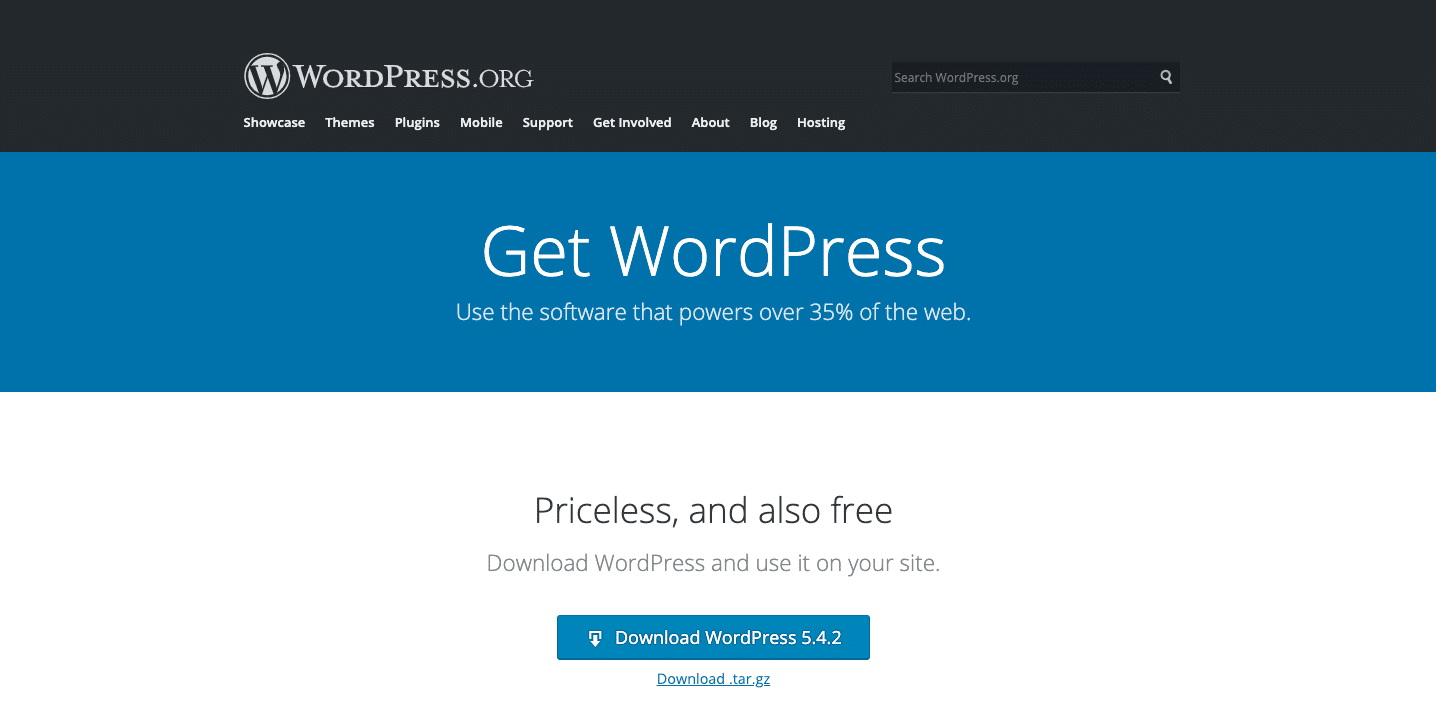
This volition download a .zip file to your computer. The next step is to extract the files. Click on the binder, and select Extract All.
When that'southward done, right-click on the folder and select Re-create. Navigate back to the binder on your figurer where you downloaded WAMP and paste the "wordpress" folder into that directory.
At this point, you tin can also rename the "wordpress" folder if you wish. The proper noun of the folder will exist the URL for your local WordPress install. For this tutorial, we'll rename ours to "mytestsite".
Pace five: Visit Your Local WordPress Site in Your Web Browser
Open your web browser and type into the search bar "http://localhost/mytestsite/". Of course, supersede "mytestsite" with whatsoever y'all named your "wordpress" folder.
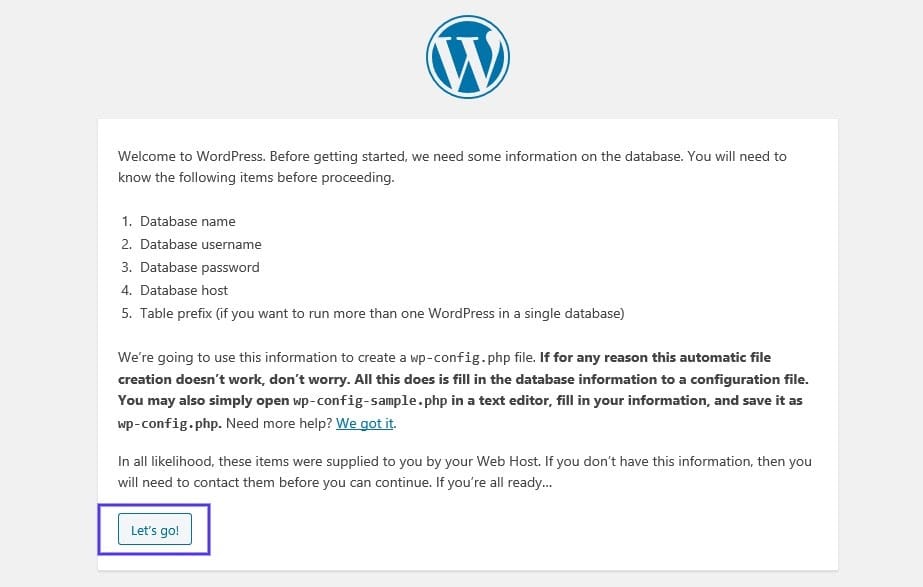
The software volition then present a series of prompts for you to gear up your WordPress installation. Y'all'll select a language and review the database data (the aforementioned series of steps we discussed in the previous section). When you're washed, click on Permit's go!:
On the next screen, you'll enter your database information. The name volition be what you called your database, the username is "root", and you tin leave the countersign field empty.
Next, click on the Run the installation button. Then you tin can name your site and create a username and password. When yous're finished, select Install WordPress. When the software is washed installing, information technology will evidence you a Success! message.
After that, you can click on Log In. This will bring you to the admin login page for your WordPress site.
That'south information technology! You now take a local testing environment installed.
How to Install WordPress Locally on Mac Using MAMP
If you're looking for local server software to utilize for a Mac estimator, you might consider MAMP. MAMP is short for Macintosh, Apache, MySQL, and PHP. It'south incredibly user-friendly and like shooting fish in a barrel to use.
Step 1: Download and Install MAMP on Your Computer
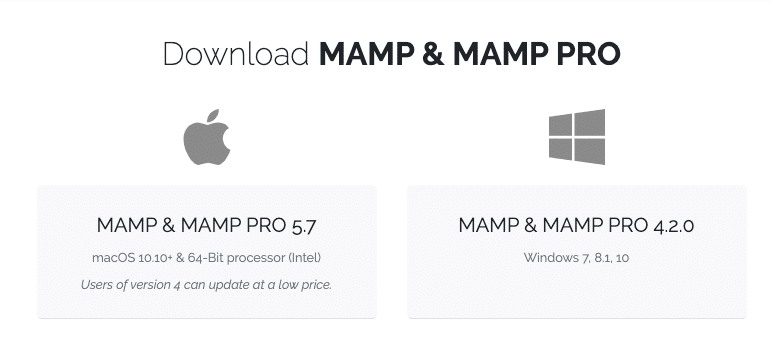
As with the two previous sections, the start footstep is to download and install MAMP on your estimator. You tin do this from the official MAMP website:
Note that while yous tin download and use MAMP for free, at that place are besides premium plans available.
Step 2: Launch MAMP and Outset Your Servers
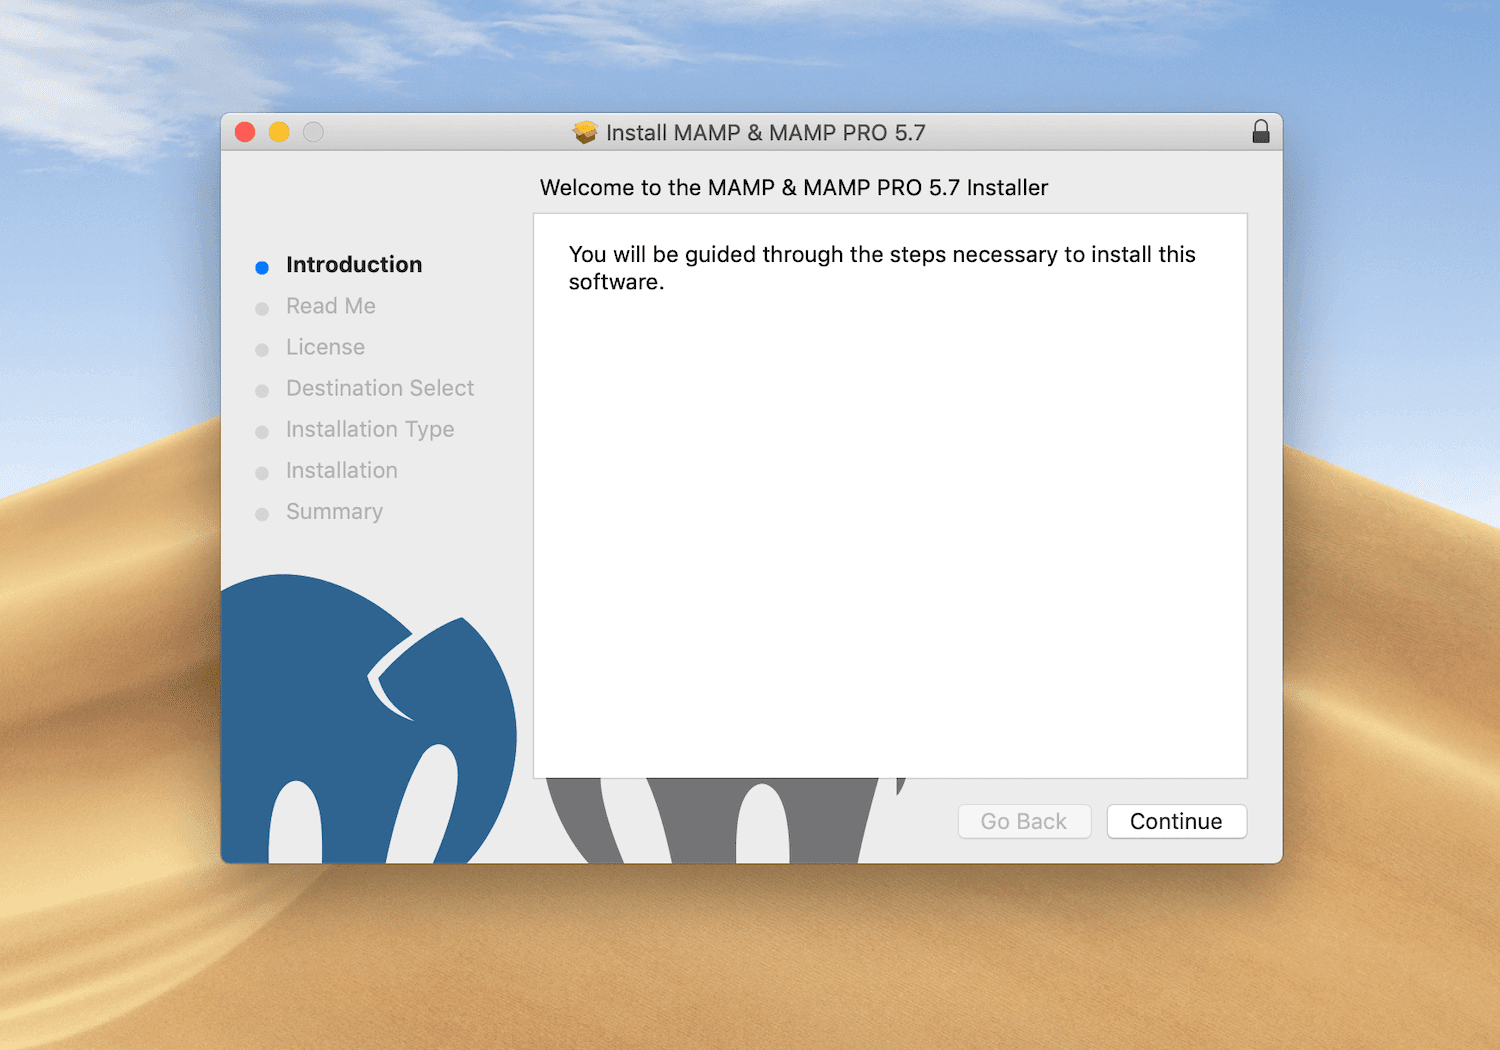
Once it'south done downloading, click on the mamp.pkg file. An installation window will pop upwardly. Select the Continue button to follow the serial of prompts:
Next, navigate to Go > Applications on your calculator and click on the MAMP folder:
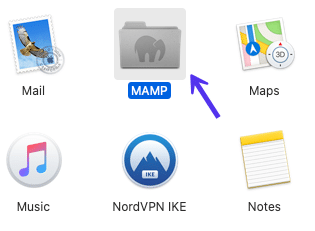
Inside that folder, click on the MAMP elephant icon:
This volition open a new window. Hit Outset Servers:
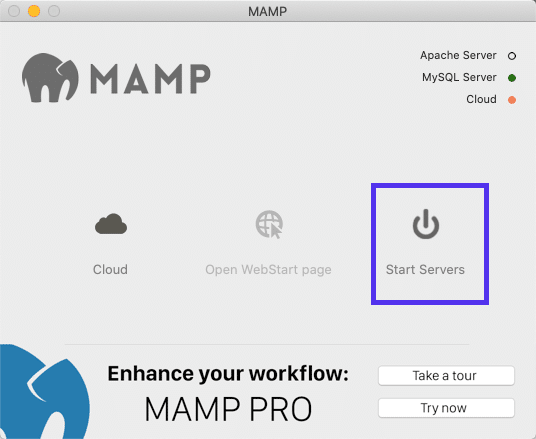
Once the Apache and MySQL servers launch, MAMP volition automatically open the WebStart page in your browser.
Step three: Create Your Database and Update Your User Information
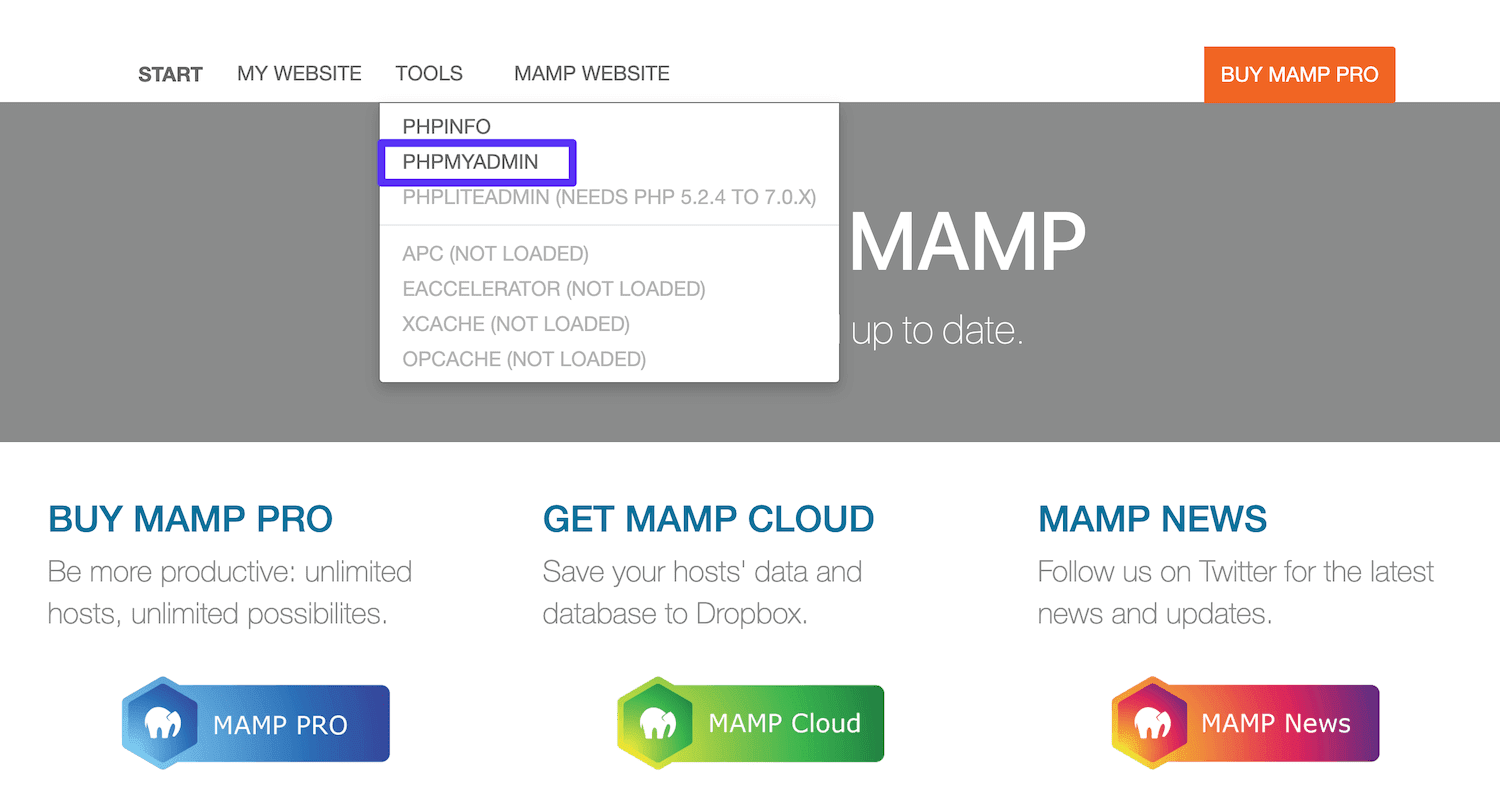
Now it's fourth dimension to create a new database. On the WebStart folio, select Tools > phpMyAdmin:
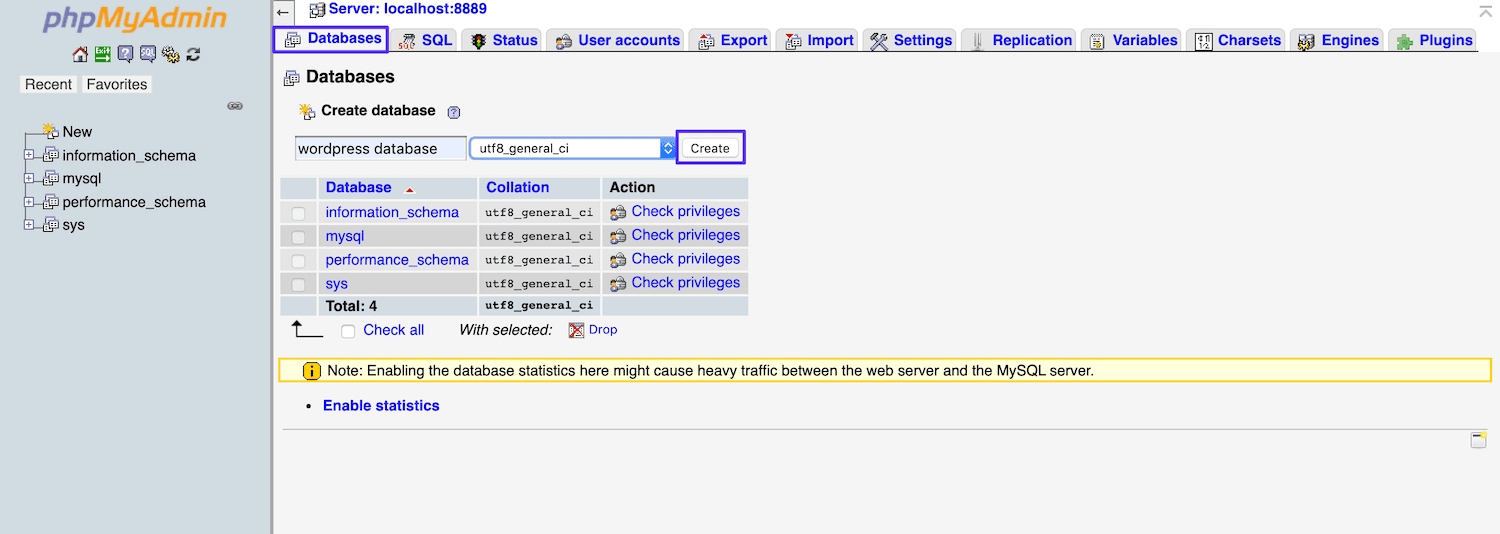
Once phpMyAdmin opens, click on the Databases tab. Proper name your database, and and then select Create:
Adjacent, yous'll need to update the MySQL database user credentials for the default account MAMP creates for you, equally yous'll need them to complete the WordPress installation process. Navigate back to the phpMyAdmin dwelling house screen, and click on the User Accounts tab.
Then, click on Edit privileges for the account with the username mamp:
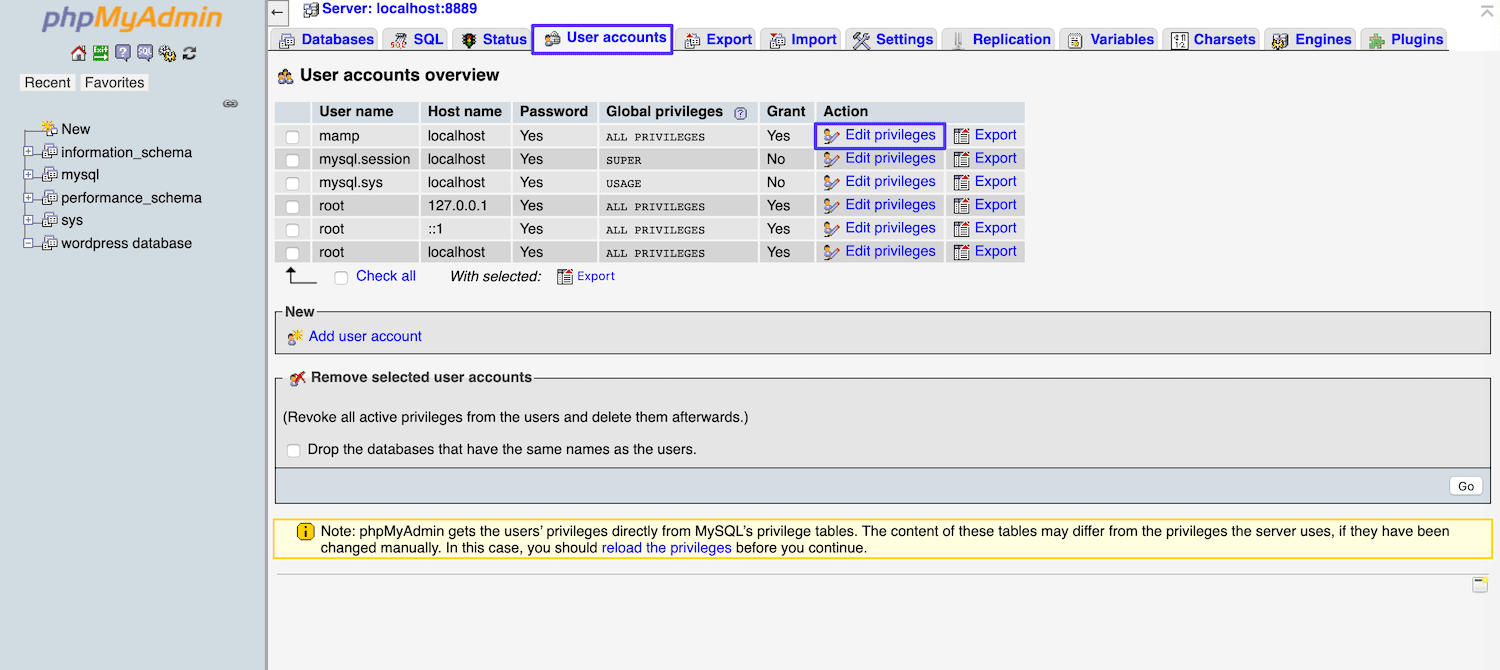
Select the Change password tab, enter your preferred countersign, and hit Become:

You can then shut phpMyAdmin.
Step 4: Install WordPress and Visit Your Site from Localhost
Now, visit the WordPress.org website and download the latest version of WordPress. Then unzip the 'wordpress' folder once it's finished downloading. Correct-click on the folder and select Copy.
Navigate back to Go > Applications > MAMP on your computer, and open the htdocs binder:
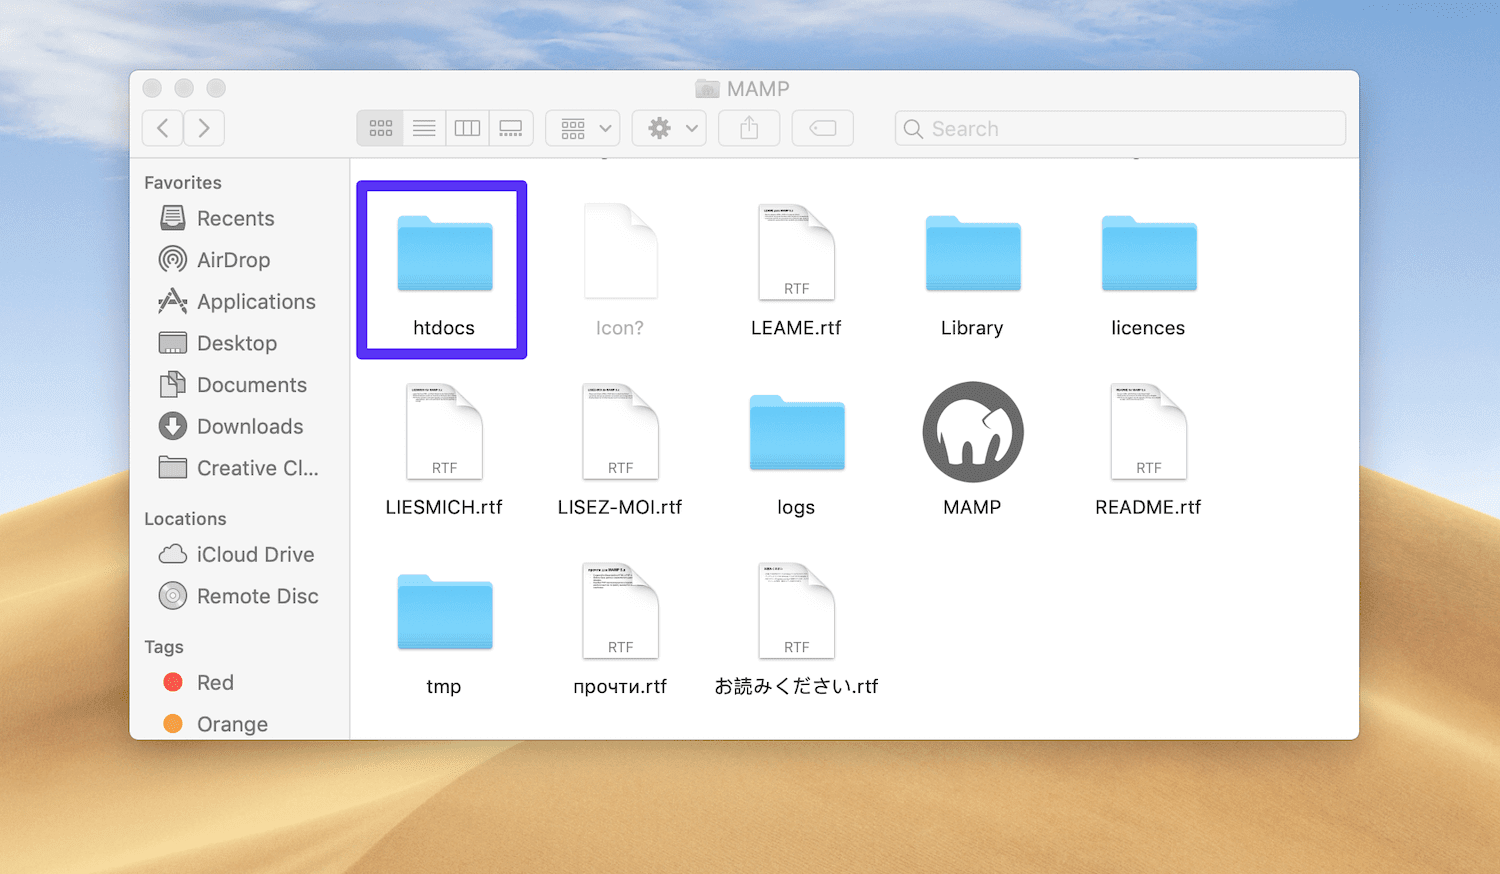
Inside that folder, paste your WordPress folder that you only copied. We propose renaming it to "mytestsite" or something like:
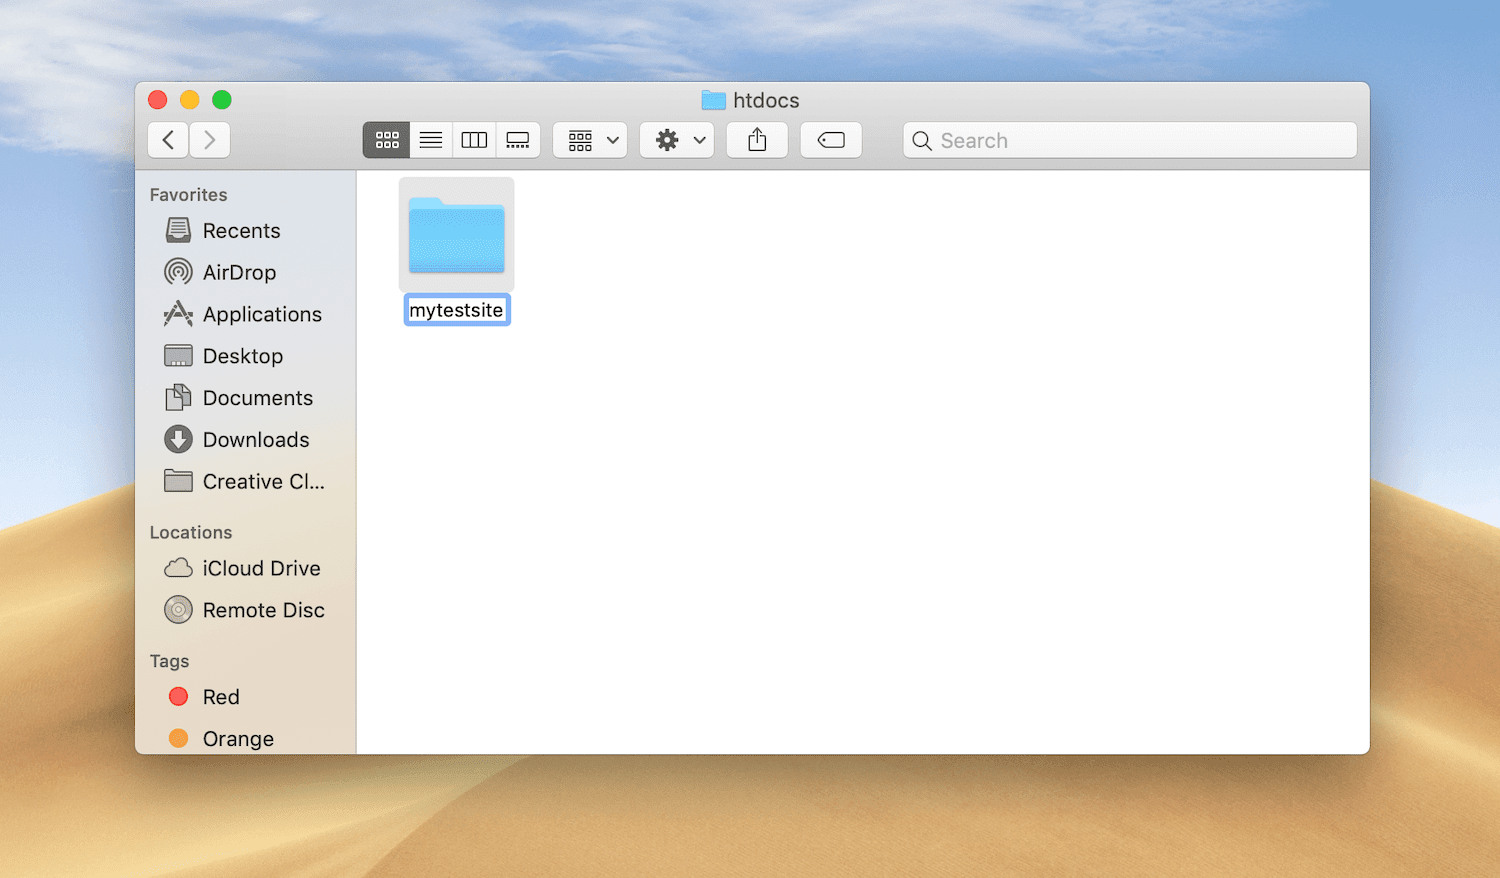
Then, browse to "http://localhost/8888/mytestsite" in a new tab. Information technology volition prompt you to input your database credentials, as well every bit name your site:
Once y'all complete the WordPress installation prompts, y'all're all done! If yous need more than instructions on this step, you lot tin refer to the previous section in this post.
You can read our guide hither near how you tin can fix the "This Site Can't Provide a Secure Connectedness" error when using MAMP.
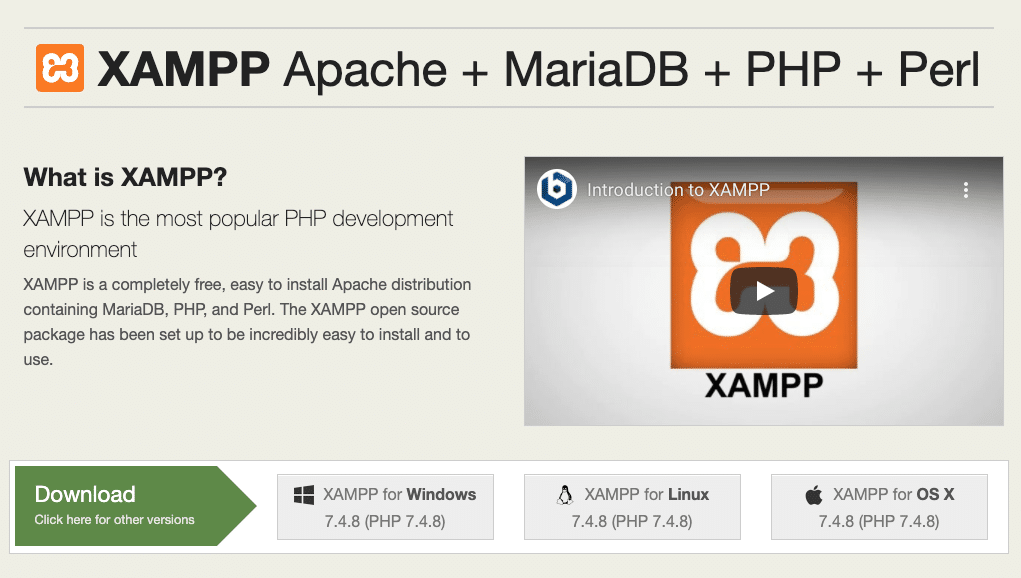
How to Install WordPress Locally Using XAMPP
XAMPP is another popular PHP development environs you tin can use to install WordPress locally. Y'all can use it for Windows, macOS, or Linux. Here, we'll walk you through how to do information technology for Windows, although the process is largely the aforementioned for Mac users.
Step one: Download and Install XAMPP on Your Computer
Visit the Apache Friends website, and adjacent to the green Download button, select XAMPP for Windows (or whichever Bone you lot're using):
The software will automatically download to your computer. When it'south finished, click on the .exe file to launch the installer.
Note that for macOS, this volition be a .dmg file. In one case you open up it, click on the XAMPP icon and drag information technology to your Applications folder.
Step ii: Choose the Components You Want to Install
Subsequently running the installer, y'all'll be asked to cull the components to install. The almost important ones to select are Apache, MySQL, PHP, and phpMyAdmin:
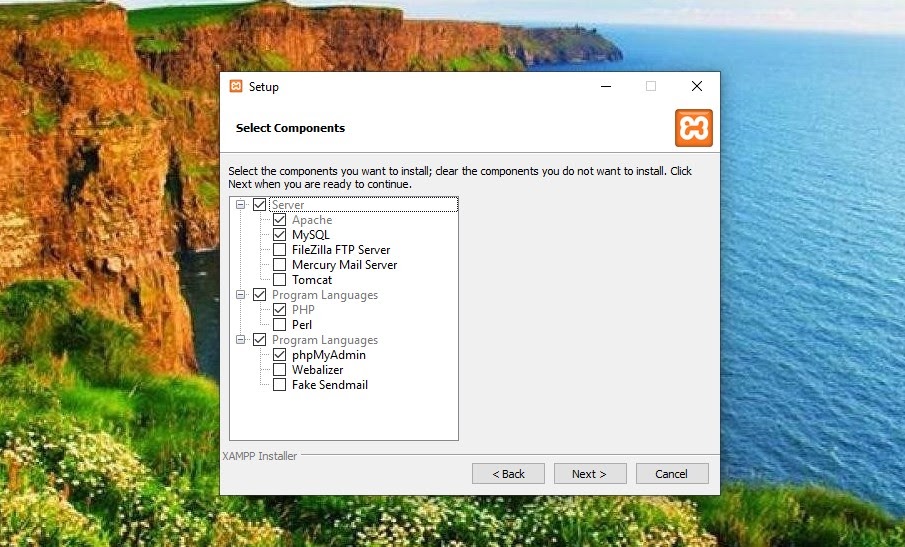
You tin uncheck the other components, as they are not necessary. When you lot're done, click on the Next button and select which binder yous want to install XAMPP on.
Click on the Side by side button again, ignore the Bitnami prompt, and select Next once once more.
Step 3: Launch the XAMPP Control Panel and Test Your Server
On the terminal screen, choose to launch the XAMPP Control Panel. In the XAMPP Command Panel that opens, y'all can click the Start buttons adjacent to both Apache and MySQL:
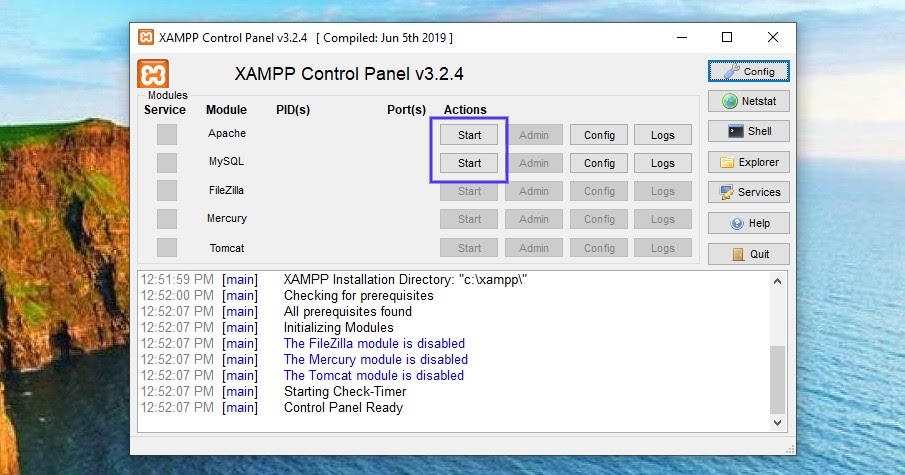
Later on you launch them, the condition should turn to green. At present it's fourth dimension to exam your server. You lot tin can do this past entering "http://localhost/" into your web browser. If it works, you have successfully added XAMPP to your computer.
Footstep iv: Download WordPress and Create a Database
The side by side step is to install WordPress on your computer. You can do this by going to WordPress.org and clicking on Get WordPress.
When the package is finished downloading, extract the files, and then copy the folder. Side by side, navigate to the XAMPP folder on your computer, and locate and open the htdocs folder.
Adjacent, create a new binder within the htdocs binder. You lot tin can proper noun it something along the lines of "mytestsite". Within that binder, paste the WordPress files.
Now it'due south time to create your database.
Navigate back to your XAMPP control console and select Admin adjacent to MySQL. This will launch phpMyAdmin.
Click on Databases, then name your database and select Create (you can refer to previous sections if you lot demand more guidance).
You can proper name your database any you want. Withal, we suggest keeping information technology simple and memorable, such as "test_db".
Step five: Install WordPress Locally By Visiting Your Site in Your Browser
To consummate the procedure, you can visit "http://localhost/mytestsite" in your browser. Retrieve to replace "mytestsite" with whatever you named your WordPress folder.
You'll be prompted to select a language, name your site, and fill up in your database details. Then you can log into your WordPress site and start using your local environment!
Summary
By setting upwardly a WordPress local environment, y'all can test new features and develop your WordPress sites fully before taking them live. In fact, in that location are a multifariousness of methods you can use to install WordPress locally on your computer.
In this article, we explained how you can do this on both Mac and Windows via a local server environment software such as DevKinsta, DesktopServer, WAMP, MAMP, or XAMPP. Although the specific instructions vary depending on which tool y'all use, the process tin can be summarized in five master steps:
- Download and install local environment software to your computer.
- Open the .exe/.dmg file and run the installer.
- Create a blank MySQL database.
- Download the latest version of WordPress.
- Visit your test site in your browser to consummate the localhost setup process.
Save fourth dimension, costs and maximize site performance with:
- Instant help from WordPress hosting experts, 24/seven.
- Cloudflare Enterprise integration.
- Global audience reach with 29 data centers worldwide.
- Optimization with our built-in Application Performance Monitoring.
All of that and much more, in one programme with no long-term contracts, assisted migrations, and a thirty-twenty-four hour period-money-back-guarantee. Check out our plans or talk to sales to notice the plan that's right for you.
Source: https://kinsta.com/blog/install-wordpress-locally/
0 Response to "29-Jul"
Post a Comment